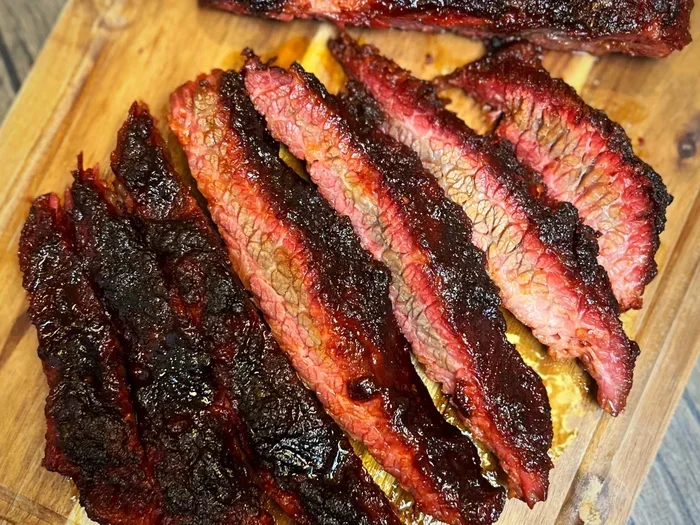
How To Cook Bbq Brisket In Oven And Get It Perfect
Learning how to cook BBQ brisket in the oven is simpler than you think. This guide covers everything from picking the perfect cut to achieving that mouthwatering bark. Follow our steps for tender, juicy oven-braised brisket that rivals any smoker.
There’s nothing quite like a perfectly cooked BBQ brisket. The tender meat, the smoky bark, the juicy slices — it’s a centerpiece that brings everyone to the table. But many people think you need an expensive smoker or hours of outdoor fuss to get that result. How To Cook Bbq Brisket In Oven proves that wrong. With just your kitchen oven, some simple seasoning, and a little patience, you can achieve restaurant-quality brisket right at home.
The oven method relies on low and slow cooking. By keeping the temperature low for several hours, the tough collagen in the brisket melts into gelatin. This creates a melt-in-your-mouth texture that’s hard to beat. Whether you’re a beginner or a seasoned cook, this guide walks you through every step. You’ll learn how to pick the right cut, build a flavor-packed rub, and monitor the internal temperature for perfect doneness.
We’ll also cover common mistakes and pro tips that make the difference between good and great. By the end, you’ll feel confident enough to cook BBQ brisket in the oven for your next family dinner or weekend gathering. Let’s dive in.
Key Takeaways
- Low and slow is the secret: Cooking at 225°F to 250°F breaks down tough connective tissue for melt-in-your-mouth tenderness.
- Choose the right cut: The flat cut is leaner and easier to slice, while the point has more marbling and juiciness.
- A simple dry rub does the work: A mix of salt, pepper, garlic powder, and paprika builds a flavorful bark.
- Wrapping in foil partway through: This technique (the Texas crutch) keeps the meat moist and speeds up cooking.
- Rest before slicing: Let the brisket rest for at least 30 minutes to redistribute juices and stay tender.
- Slice against the grain: Cutting perpendicular to the muscle fibers ensures each slice is easy to chew.
📑 Table of Contents
How To Cook Bbq Brisket In Oven: Why It Works So Well
The Magic Of Low And Slow Cooking
Brisket comes from the chest area of the cow. It’s a hardworking muscle that contains a lot of connective tissue. If you cook it fast and hot, it becomes tough and chewy. But cook it slow and low, and the collagen breaks down into rich, gelatinous goodness. This process is called collagen breakdown. It’s the secret behind tender oven-braised brisket.
Most experts recommend a temperature between 225°F and 250°F. At this range, the meat slowly absorbs heat and the fat renders out. The muscle fibers relax and become tender. A whole packer brisket can take 10 to 14 hours in the oven. But the wait is worth it. You’ll get a deep, complex flavor that’s impossible to rush.
One of the best things about oven cooking is consistency. Your oven holds a steady temperature, unlike an outdoor smoker that might have hot spots. This means even cooking from edge to center. You don’t have to worry about wind or rain either. Just set it and let it do its work.
Oven Vs Smoker: Why The Oven Wins
A smoker gives you that classic wood-fired flavor. But it requires constant attention. You need to manage fire, add wood chips, and watch the weather. The oven, on the other hand, offers a controlled environment. It’s especially great for beginners who are still learning the ropes of BBQ brisket making.
Here are some reasons why cooking BBQ brisket in the oven is a smart choice:
- Consistent heat: No hot spots or temperature swings.
- No weather worries: Rain or snow won’t stop you.
- Easier cleanup: One pan instead of a greasy smoker grate.
- Less monitoring: Set it and check it every hour or so.
- Year-round cooking: Make BBQ brisket any time of year.
You can also use the convection setting on your oven for even better air circulation. Just make sure not to open the door too often. Every time you open it, you lose heat and extend the cooking time. A steady environment is the foundation of great oven-braised brisket.
Choosing The Right Brisket For Oven Cooking
Flat Cut Vs Point Cut
A whole packer brisket has two main parts. The flat cut is the leaner, thinner piece. It’s great for slicing and sandwiches. The point cut is fattier and more marbled. It’s perfect for chopping or making burnt ends. Many beginners start with the flat cut because it’s easier to handle and more forgiving.
If you want the best of both worlds, buy a whole packer brisket. This is the entire muscle with the fat cap still on. It gives you more flavor and lets you practice trimming. Look for a brisket that weighs between 10 and 15 pounds. Anything smaller might dry out. Anything larger might not fit in your oven. The fat cap is your natural basting system, so always choose a cut with a good layer of fat.
Expert Insight: Ask your butcher to trim the brisket for you if you’re unsure. They can remove the hard fat and leave the perfect amount of marbling. This saves you time and ensures even cooking. Marbling is the white flecks of fat inside the meat. More marbling means more flavor and juiciness during the long low and slow roast.
Size And Thickness Matter
The thickness of the brisket affects cooking time. A thicker piece takes longer to reach the right internal temperature. Try to choose a brisket that’s relatively uniform in thickness. If one end is much thicker, you can fold it under or position it toward the back of the oven where it’s cooler.
Quick Tips:
- Look for a brisket with a flat, even shape.
- Avoid pieces with huge fat pockets.
- A 12-pound packer brisket is a great size for most ovens.
- Thaw the brisket fully before seasoning, usually 24 hours in the fridge.
- Check the size of your oven cavity before buying the brisket.
Essential Prep And Seasoning
The Perfect Dry Rub
A simple dry rub is all you need for incredible BBQ brisket. You don’t need fancy ingredients. Start with coarse salt and black pepper. Then add garlic powder, onion powder, paprika, and a pinch of cumin. Mix them together in a small bowl. The salt helps draw out moisture and form a great bark. The pepper adds a subtle heat that complements the beef.
Apply the rub generously all over the brisket. Don’t be shy. You want a visible layer of seasoning on every side. You can apply the rub the night before and let it sit in the fridge. This allows the flavors to penetrate deep into the meat and creates a deeper smoke flavor even without a smoker.
Here’s a basic rub recipe you can use every time:
- 1/4 cup coarse salt
- 1/4 cup black pepper
- 2 tablespoons garlic powder
- 2 tablespoons onion powder
- 1 tablespoon paprika
- 1 teaspoon cumin
- 1 teaspoon chili powder (optional)
Stir it all together. Store in a jar. You’ll always have a ready-made BBQ seasoning on hand. This simple blend works beautifully for any beef brisket you cook in the oven.
Trimming The Fat Cap
The fat cap is the layer of fat on one side of the brisket. You want to leave about a quarter-inch of fat. This layer bastes the meat as it cooks and keeps it moist. But you should trim any hard, thick chunks of fat. They won’t render properly and can leave greasy pockets in your slices.
Use a sharp knife and trim at a slight angle. Remove any silver skin as well. Silver skin is a tough membrane that won’t melt. It can make your slices chewy. A clean, even fat cap helps the oven-braised brisket cook evenly and develop a beautiful crust.
Common Mistake: Many people trim too much fat. This leads to dry brisket. Leave enough fat to protect the meat, but remove the hard pieces. Think of it as creating a natural basting system that keeps your BBQ brisket juicy throughout the long cook.
The Oven Cooking Process Step By Step
Setting Up Your Oven
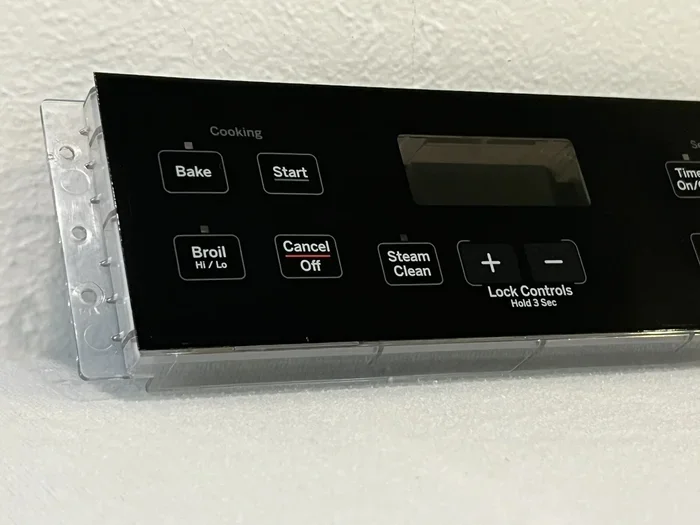
Preheat your oven to 225°F or 250°F. While it’s warming, place a rack inside a large roasting pan. The rack keeps the brisket out of the drippings. This prevents steaming and helps the bark form. You can also use a disposable aluminum pan for easy cleanup.
Place the seasoned brisket on the rack with the fat cap facing up. The fat side up allows the melting fat to baste the meat from above. If your brisket has a thick point end, you can position that toward the back of the oven. The back is usually cooler, which gives you more control over the doneness and prevents the thinner flat from drying out.
Quick Tips:
- Use a roasting pan with a wire rack.
- Place a drip pan underneath to catch juices.
- Line the pan with foil for easy cleanup.
- Ensure the brisket fits with at least 2 inches of space on all sides.
- Keep a small bowl of water in the oven to maintain humidity.
The Low And Slow Roast
Now the real patience begins. Close the oven door and let the low and slow heat work its magic. Insert a probe thermometer into the thickest part of the brisket. Avoid touching the fat cap or bone. You want the reading from the meat itself. This internal temperature is your most important guide.
The target internal temperature is 195°F to 205°F. At this range, the collagen has fully broken down. The meat will be tender and juicy. Plan for about 1 to 1.5 hours per pound of brisket. So a 12-pound brisket might take 12 to 18 hours. Don’t rush it by raising the temperature. High heat makes the meat tough and chewy. The low and slow approach is the only way to achieve that perfect oven-braised brisket texture.
Check the temperature every hour or so. You don’t need to open the door constantly. Just glance at the thermometer through the oven window if you can. If the brisket is browning too quickly on top, you can tent it loosely with foil. But avoid wrapping it too early, or you’ll steam the bark away.
The Wrap Or No Wrap Debate
The Texas crutch is a popular technique. After about 4 to 5 hours of cooking, when the bark has set, you wrap the brisket in butcher paper or aluminum foil. This speeds up the cooking process and keeps the meat moist. Many pitmasters swear by it. It’s especially helpful if you’re short on time.
Butcher paper is breathable and lets some steam escape. It preserves a good bark while adding moisture. Foil traps all the steam and makes the meat very tender, but it can soften the bark. Choose based on your preference. If you love a thick, crunchy bark, go with butcher paper.
Here’s how to wrap properly:
- Remove the brisket from the oven when it hits an internal temp of around 165°F to 170°F.
- Lay out a large sheet of butcher paper or foil.
- Place the brisket in the center.
- Wrap it tightly, leaving the ends open so steam can escape slightly.
- Return it to the oven and continue cooking until it reaches 195°F to 205°F.
Common Mistake: Wrapping too early. If you wrap before the bark has formed, you’ll wash it away. Wait until the bark is dark and set. The brisket should feel firm but have some give when you press it. The Texas crutch is a tool, not a rule. Use it when it makes sense for your schedule.
Common Mistakes To Avoid
Even experienced cooks make errors. Here are the most common ones and how to fix them:
- Skipping the thaw: Cooking a frozen brisket leads to uneven heat and longer cooking times. Always thaw it fully in the fridge for 24 hours.
- Opening the oven too often: Every peek drops the temperature. Trust the process and check only once an hour.
- Using the wrong rack position: Place the brisket in the center of the oven. Too close to the top element and it will burn. Too low and it will steam.
- Not using a probe thermometer: Relying on time alone is unreliable. A probe thermometer takes the guesswork out of BBQ brisket cooking.
- Cutting too soon: Resting is non-negotiable. Slicing right away releases all the juices and leaves you with dry meat.
Achieving Perfect Bark And Smoke Flavor
Using Liquid Smoke
Since you’re using an oven, you won’t get natural wood smoke. But you can add a touch of liquid smoke to mimic that flavor. Liquid smoke is made from condensed wood smoke. A few drops go a long way. Too much can make the brisket taste bitter or artificial.
Add 1/2 to 1 teaspoon of liquid smoke to your dry rub. Or mix it with a little apple cider vinegar and brush it on the brisket before cooking. This adds a subtle smoky depth that complements the bark. Choose a high-quality liquid smoke with no additives for the best results. Look for ones made from hickory or mesquite wood for an authentic smoke flavor.
Expert Insight: Don’t rely on liquid smoke alone. The real flavor comes from your rub and the Maillard reaction. The Maillard reaction is the chemical process that creates browning and complex flavors. It happens slowly at low temperatures over many hours. That’s why patience is so important. The longer the cook, the deeper the BBQ flavor develops.
Building A Bark With Spice
The bark is the dark, flavorful crust on the outside of the brisket. It’s one of the most prized parts of BBQ brisket. Building a great bark starts with your rub and the oven’s dry heat. As the meat cooks, the sugars in the rub caramelize. The proteins and fats react with the heat. This creates a complex, savory crust that’s full of texture and taste.
To maximize bark formation, keep the oven door closed. Every peek lets out heat and moisture. Use a light coat of yellow mustard as a binder before applying the rub. The mustard doesn’t add much flavor, but it helps the rub stick to the meat. It also burns off completely, leaving only the spice behind.
Quick Tips:
- Apply the rub at least 1 hour before cooking, or overnight.
- Use coarse ground pepper for a rougher, crunchier bark.
- Don’t add sugar to your rub if you want a firm bark; sugar can burn at low temperatures over long periods.
- Keep the fat cap up so the rendered fat bastes the bark.
- Pat the meat dry before applying the rub for better adhesion.
Resting And Slicing For The Best Results
Why Resting Is Non-Negotiable
When the brisket hits the target internal temperature, your first instinct might be to slice into it. Don’t. Resting is just as important as cooking. The juices inside the meat are under pressure from the heat. If you cut too soon, they’ll run out onto the cutting board. You’ll end up with dry slices and a messy plate.
Remove the brisket from the oven and wrap it tightly in butcher paper or foil. Then wrap it in a thick towel. Place it in a cooler (not a regular cooler, but an empty one) or a warm oven turned off. Let it rest for at least 30 minutes to 1 hour. Some pitmasters rest for up to 2 hours. The meat will stay hot and the juices will redistribute evenly. This step transforms a good brisket into a great one.
Common Mistake: Skipping the rest. This is one of the biggest reasons brisket turns out dry. Give it time, and you’ll be rewarded with juicy, tender slices that hold together perfectly on the board.
How To Slice Against The Grain
Slicing against the grain is crucial for tender bites. The grain is the direction of the muscle fibers. If you slice parallel to them, each slice is full of long fibers that are hard to chew. If you slice perpendicular, you’re cutting those fibers short, making the meat much easier to eat. This simple technique makes all the difference in juicy brisket.
To find the grain, look at the flat cut. The fibers run lengthwise. For the flat, slice across the width. For the point, the grain often changes direction partway through. Rotate the slice as needed. Use a sharp slicing knife and cut against the grain at a slight angle for wider, more tender pieces.
Slice the brisket about pencil-thickness. Not too thin, or it’ll dry out. Not too thick, or it won’t be tender. Lay the slices on a platter and spoon any resting juices over the top. This keeps everything moist and flavorful. Serve immediately and enjoy the fruits of your labor.
Quick Tips:
- Use a long, sharp slicing knife or carving knife.
- Slice just before serving to keep the juices locked in.
- Save the leftovers for amazing sandwiches the next day.
- Reheat sliced brisket gently in the oven or microwave with a splash of broth.
Mastering how to cook BBQ brisket in the oven is a rewarding skill that anyone can learn. It saves you money, avoids weather hassles, and delivers incredible flavor. Follow these steps, and you’ll have a tender, juicy brisket that everyone will love. Start with a simple rub, be patient, and let the oven do the work. Your perfect BBQ brisket is just a few hours away.
Frequently Asked Questions
Can I cook a brisket in the oven without a probe thermometer?
You can, but a probe thermometer is the best way to ensure perfect doneness. It takes the guesswork out of the process and helps you hit the sweet spot of 195°F to 205°F. Without one, you risk undercooking or overcooking your oven-braised brisket.
How long does it take to cook a brisket in the oven at 225°F?
Plan for about 1 to 1.5 hours per pound. A 12-pound brisket will take roughly 12 to 18 hours. The low and slow method takes time, but it’s what creates the tender, juicy texture you’re looking for.
Is it better to use foil or butcher paper to wrap the brisket?
Butcher paper is more breathable and preserves a better bark. Foil traps steam and makes the meat very tender but can soften the crust. Choose butcher paper if you want a crunchier bark, or foil if you prefer ultra-tender meat.
What temperature should I rest my brisket at?
Keep the wrapped brisket in a cooler or warm oven (around 150°F to 170°F) while it rests. The goal is to keep it hot without continuing to cook it. Resting for at least 30 minutes allows the juices to redistribute for the juiciest slices.
Can I use a convection oven for cooking brisket?
Yes, convection ovens work well for brisket. The fan circulates hot air for more even cooking. Just reduce the temperature by about 25°F and check for doneness earlier. Convection can shorten the overall cook time slightly.
How do I reheat leftover oven brisket without drying it out?
Wrap the slices in foil with a splash of beef broth or apple juice. Heat gently in the oven at 250°F until warmed through. This keeps the meat moist and prevents the BBQ brisket from drying out. Avoid microwaving if possible, as it can make the slices tough.