How To Clean A Cast Iron Dutch Oven With Salt Easily
Learning how to clean a cast iron Dutch oven with salt is one of the easiest and most effective ways to keep your cookware in top shape. Salt acts as a natural abrasive that lifts stuck-on food without damaging the seasoning layer. This guide covers everything from basic cleaning steps to advanced maintenance tips so your Dutch oven lasts for decades.
There is something deeply satisfying about cooking with a cast iron Dutch oven. Whether you are simmering a hearty stew, baking bread, or frying chicken, this heavy-duty cookware delivers results that no other pan can match. But here is the thing many people overlook. A cast iron Dutch oven demands proper care. And when food sticks to the surface or grease builds up over time, knowing the right cleaning method becomes essential.
If you have ever stared at a burnt, caked-on mess inside your Dutch oven and wondered what to do, you are not alone. Many cooks reach for harsh chemicals or abrasive scrubbers. But there is a better way. Cleaning a cast iron Dutch oven with salt is a time-tested method that works beautifully. It is simple, affordable, and safe for your seasoning. In this guide, we will walk you through every step. You will learn why salt works so well, what supplies you need, and how to keep your Dutch oven in perfect condition for years to come.
Key Takeaways
- Salt is a gentle yet powerful abrasive: It cleans cast iron effectively without stripping the seasoning layer.
- Kosher salt or coarse salt works best: These types provide the right texture for scrubbing without dissolving too fast.
- Always dry your Dutch oven immediately: Moisture is the number one enemy of cast iron and causes rust.
- Re-season after every deep clean: This preserves the non-stick surface and protects the pan.
- Avoid soap and steel wool: Both can damage the seasoning and shorten the life of your cookware.
- Clean your Dutch oven after every use: Regular maintenance prevents buildup and makes cleaning easier over time.
- Salt cleaning works for all cast iron cookware: The same method applies to skillets, pans, and Dutch ovens alike.
📑 Table of Contents
- Why Salt Is the Best Way to Clean Your Cast Iron Dutch Oven
- What You Need Before You Start
- Step-by-Step: How To Clean A Cast Iron Dutch Oven With Salt
- Common Mistakes to Avoid When Cleaning Cast Iron
- How to Deal with Tough Stains and Burnt Food
- Maintaining Your Cast Iron Dutch Oven for Long-Term Use
- Frequently Asked Questions About Cleaning Cast Iron Dutch Ovens
- Final Thoughts
Why Salt Is the Best Way to Clean Your Cast Iron Dutch Oven
Before we dive into the steps, let us talk about why salt is such a great cleaning agent for cast iron. Understanding the science behind salt cleaning helps you appreciate this method even more.
The Science Behind Salt Cleaning
Salt is a natural abrasive. That means it can scrub away stuck-on food particles without scratching or damaging the surface of your Dutch oven. Unlike chemical cleaners, salt does not strip away the seasoning layer. The seasoning is the thin coating of polymerized oil that gives cast iron its natural non-stick properties. When you use salt, you remove debris while preserving this protective layer.
Coarse salt grains also absorb moisture and grease. This makes them excellent for lifting oil residue and food bits from the porous surface of cast iron. The texture of the salt particles creates friction against the pan. That friction loosens burnt food without requiring much elbow grease on your part.
Why Salt Works Better Than Other Methods
Many people ask, “Why not just use soap?” The truth is that soap can break down the seasoning over time. Some cooks avoid it entirely for this reason. Steel wool and metal scrapers are even worse. They can scratch the cast iron surface and ruin the smooth finish you have built up through regular use.
Salt offers a middle ground. It is tough enough to clean effectively but gentle enough to protect your pan. It is also something you already have in your kitchen. There is no need to buy special cleaners or tools. This makes salt cleaning one of the most accessible cast iron care tips you can follow.
Another advantage of salt is that it does not leave behind any residue. Chemical cleaners sometimes leave a film that affects the taste of your food. Salt leaves nothing behind. It simply does its job and washes away.
What You Need Before You Start
Getting ready is simple. You do not need any fancy products or expensive tools. Here is what you will need to gather before you begin the cleaning process.
Essential Supplies
- Coarse kosher salt or sea salt: This is your primary cleaning agent. Avoid fine table salt because it dissolves too quickly and does not provide enough abrasion.
- A clean cloth or paper towel: Use this to scrub the interior surface of the Dutch oven.
- A soft sponge (optional): Only use this for rinsing. Never use it for scrubbing.
- Vegetable oil, flaxseed oil, or shortening: You will need this for re-seasoning after cleaning.
- A heat source: Your stovetop or oven will work for the drying and seasoning steps.
- A dry towel: For drying the pan thoroughly after rinsing.
Preparing Your Dutch Oven
Start by letting your Dutch oven cool down completely. Never attempt to clean a hot cast iron pan with cold water. The sudden temperature change can cause thermal shock. This may lead to cracking or warping of the cookware.
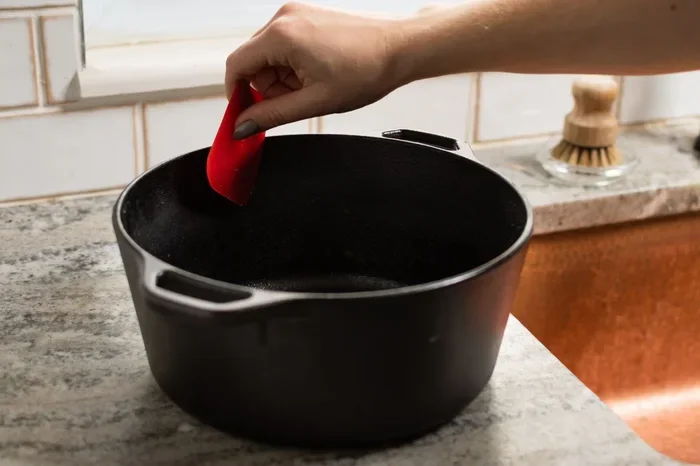
Once the pan is cool enough to handle safely, remove any large food particles. You can use a wooden spoon or spatula to scrape off the bigger bits. This makes the salt cleaning process much easier and more effective.
Step-by-Step: How To Clean A Cast Iron Dutch Oven With Salt
Now that you have your supplies ready, let us walk through the actual cleaning process. Follow these steps carefully for the best results.
Step 1: Let It Cool Down Completely
After cooking, remove your Dutch oven from the heat source. Set it on a heat-safe surface and let it rest until it reaches room temperature. This usually takes about 20 to 30 minutes depending on what you cooked. Rushing this step can lead to burns or damage to the pan.
Quick tip: If you are in a hurry, place the Dutch oven on a cool stovetop burner. Do not submerge it in water while it is still warm. Always allow adequate cooling time before starting the cleaning process.
Step 2: Apply the Salt Generously
Pour a generous amount of coarse kosher salt into the Dutch oven. You want enough salt to cover the areas with stuck-on food. The salt acts as both the cleaning agent and the abrasive material. Use about one to two tablespoons for a standard-sized Dutch oven. Adjust the amount based on the size of your pan and how much residue needs cleaning.
If there is a lot of grease or oil buildup, the salt will absorb some of it as you work. This is normal and actually part of the cleaning process. The salt pulls moisture and grease out of the porous cast iron surface.
Step 3: Scrub with a Cloth or Paper Towel
Take a dry cloth or folded paper towel and press it into the salt. Begin scrubbing the interior surface in circular motions. Apply moderate pressure. The salt grains will catch on any stuck-on food and lift it away from the surface.
For stubborn spots, add a little more salt and continue scrubbing. You can also use the salt as a paste by mixing it with a small amount of water. This creates a thicker abrasive that works well on particularly tough residue. Keep scrubbing until the surface looks clean and no food particles remain.
Quick tip: If you are dealing with a heavily burnt Dutch oven, let the salt sit for a few minutes before scrubbing. This gives the salt time to absorb moisture and soften the burnt bits. It makes the scrubbing process much easier.
Step 4: Rinse and Dry Thoroughly
Once you have scrubbed the entire interior, rinse the Dutch oven with warm water. Use your hands or a soft sponge to remove any remaining salt and loosened debris. Do not use soap unless absolutely necessary. If you must use a small amount of mild soap, rinse it off completely.
Drying is the most critical step in the entire process. Cast iron and moisture are a dangerous combination. Any water left on the surface can lead to rust. Use a dry towel to wipe the pan immediately after rinsing. Then place the Dutch oven on a warm stovetop burner over low heat for two to three minutes. This ensures every trace of moisture evaporates completely.
Important: Never store your Dutch oven while it is still damp. Always verify that it is completely dry before putting it away.
Step 5: Re-Season Your Dutch Oven
After drying, apply a thin layer of oil to the interior surface. Use a cloth or paper towel to spread a small amount of vegetable oil, flaxseed oil, or shortening evenly across the inside. You want a very thin coat. Too much oil will leave a sticky residue that defeats the purpose of seasoning.
Place the Dutch oven upside down in your oven at 375 degrees Fahrenheit for about one hour. This helps the oil polymerize and bond with the cast iron surface. Once it cools, your Dutch oven will have a fresh, protective seasoning layer.
Key takeaway: Re-seasoning after every deep clean is one of the best Dutch oven maintenance habits you can build. It keeps the pan non-stick and prevents rust from forming.
Common Mistakes to Avoid When Cleaning Cast Iron
Even experienced cooks sometimes make mistakes when caring for their cast iron. Knowing what to avoid can save you a lot of trouble and extend the life of your Dutch oven significantly.
Using Too Much Water
Cast iron is not dishwasher-safe. Prolonged exposure to water will cause rust. Keep your rinsing time short and always dry the pan immediately. If you need to remove a lot of stuck-on food, use the salt method rather than soaking the pan in water.
Skipping the Drying Step
This cannot be stressed enough. Many people rinse their cast iron and then set it on a drying rack to air dry. This is a mistake. Air drying leaves moisture in the pores of the cast iron. That moisture leads to rust. Always dry your Dutch oven with a towel and then heat it on the stove to remove any remaining dampness.
Using Harsh Cleaners or Steel Wool
Steel wool, abrasive pads, and harsh chemical cleaners will strip away your seasoning. Once the seasoning is gone, you will need to start the seasoning process from scratch. This is time-consuming and frustrating. Stick with the salt method and a soft cloth for everyday cleaning.
Neglecting Regular Maintenance
Some people only clean their cast iron when it looks dirty. This is a recipe for disaster. Regular maintenance prevents buildup and keeps your Dutch oven in excellent condition. Clean your Dutch oven after every use, even if it looks clean. A quick salt scrub and oil application takes only a few minutes.
How to Deal with Tough Stains and Burnt Food
Sometimes your Dutch oven will have really tough stains or burnt-on food that a simple salt scrub cannot handle. Here is how to tackle those difficult situations without harming your cookware.
The Boiling Water Method
Fill your Dutch oven with water and bring it to a boil on the stovetop. Let it simmer for 10 to 15 minutes. The heat and steam will loosen the burnt food particles. After boiling, remove the water, let the pan cool slightly, and then apply your salt scrub. This two-step process works wonders on even the most stubborn residue.
Making a Salt Paste
For extra cleaning power, mix coarse salt with a small amount of water to form a thick paste. Apply the paste directly to the stained areas and let it sit for 15 to 20 minutes. The salt will absorb moisture and break down the burnt food. After letting it sit, scrub with a cloth and rinse thoroughly.
Expert insight: If you are dealing with rust spots, use a chain mail scrubber or fine-grade steel wool very gently. Remove the rust completely, then clean with salt, dry thoroughly, and re-season immediately. Rust removal requires more effort, but it is entirely possible to restore a cast iron Dutch oven to its former glory.
Maintaining Your Cast Iron Dutch Oven for Long-Term Use
Cleaning is only one part of cast iron care. Long-term maintenance involves a few additional habits that will keep your Dutch oven performing beautifully for decades. Think of it as building a routine that protects your investment.
Clean After Every Use
Make it a habit to clean your Dutch oven right after cooking. The longer food sits on the surface, the harder it becomes to remove. A quick salt scrub after each use takes only a couple of minutes and prevents buildup from accumulating over time.
Store It Properly
When storing your Dutch oven, place a paper towel inside the cavity. This absorbs any remaining moisture and prevents musty odors. If you stack other pots and pans on top of your Dutch oven, place a cloth or paper towel between them to prevent scratches.
Re-Season Regularly
Even with proper cleaning, the seasoning layer on your cast iron will gradually wear down. Re-seasoning every few months helps maintain a strong non-stick surface. If you notice food sticking more than usual or see dull spots on the surface, it is time to re-season.
Handle Acidic Foods Carefully
Tomato-based sauces, citrus, and other acidic foods can temporarily strip the seasoning from your cast iron. This does not mean you cannot cook these foods. Just be aware that prolonged cooking of acidic dishes in an unseasoned or poorly seasoned Dutch oven can affect the surface. Cook acidic foods for shorter periods and re-season afterward if needed.
Quick tip: If you own an enameled Dutch oven, the cleaning rules are different. Enameled cast iron does not require seasoning, and you can use mild soap without worry. However, the salt method still works well for removing stuck-on food from enameled surfaces.
Frequently Asked Questions About Cleaning Cast Iron Dutch Ovens
Can I use table salt instead of kosher salt to clean my cast iron Dutch oven?
You can, but it is not the best option. Table salt dissolves quickly and has finer grains that do not provide enough abrasion. Kosher salt or coarse sea salt works much better because the larger grains create more friction against stuck-on food. If you only have table salt available, use a bit more of it and scrub a little longer for similar results.
How often should I clean my cast iron Dutch oven with salt?
You should clean your Dutch oven after every use with a quick salt scrub. For a deeper clean, use the full salt method once a month or whenever you notice significant buildup. Regular cleaning prevents grease buildup and keeps the seasoning layer intact. The more consistently you clean, the easier each cleaning session becomes.
Will salt damage the seasoning on my cast iron Dutch oven?
No, salt will not damage the seasoning when used correctly. The seasoning is a hardened layer of polymerized oil bonded to the cast iron surface. Salt is gentle enough to remove food residue without scratching or stripping this layer. As long as you use a soft cloth and moderate pressure, your seasoning will remain intact and even improve with regular use.
What if my cast iron Dutch oven already has rust?
Rust happens, especially if the Dutch oven was stored while damp or left unused for a long time. Start by removing the rust with a chain mail scrubber or fine steel wool. Then clean the entire surface with the salt method, dry it thoroughly, and re-season the pan completely. You may need to repeat the seasoning process two or three times for heavily rusted pans. With patience, you can restore most rusted cast iron cookware to excellent condition.
Is it okay to put my cast iron Dutch oven in the dishwasher?
No. Dishwashers use harsh detergents and prolonged water exposure that will strip the seasoning and cause rust. Always hand wash your cast iron Dutch oven. The salt cleaning method is perfect for hand washing because it requires minimal water and no soap. A few minutes of hand cleaning will preserve your Dutch oven far better than any dishwasher cycle ever could.
Can I use salt cleaning on other cast iron cookware besides Dutch ovens?
Absolutely. The salt cleaning method works for all types of cast iron cookware. Whether you have a cast iron skillet, griddle, braiser, or frying pan, the same steps apply. Salt is a universal cleaning solution for cast iron. It removes food residue, absorbs grease, and preserves the seasoning layer across all cast iron products. This makes it one of the most versatile and practical cast iron cleaning methods you can use.
Final Thoughts
Cleaning a cast iron Dutch oven with salt is one of the simplest and most effective ways to care for your cookware. It requires no special products, no complicated techniques, and very little time. The salt method protects your seasoning, removes stuck-on food, and keeps your Dutch oven performing at its best. By following the steps in this guide, you are giving your cookware the care it deserves.
Remember that consistency is key. Clean your Dutch oven after every use, dry it thoroughly, and re-season regularly. These small habits add up over time and will keep your cast iron in excellent condition for decades. Whether you use your Dutch oven for weekly family dinners or special holiday meals, proper maintenance ensures it is always ready to deliver delicious results.
Now that you know how easy and effective salt cleaning can be, there is no reason not to give it a try. Your Dutch oven has been working hard for you. It is time to return the favor with the care and attention it deserves. Grab some coarse salt, a clean cloth, and start cleaning. Your cast iron cookware will thank you for it.