Why Didnt My Sourdough Rise In The Oven Again Today
Learn exactly why your sourdough didn’t rise in the oven and how to prevent it from happening again. This guide covers the most common reasons for sourdough baking failures, from weak starter to wrong oven temperature. You’ll get practical, tested solutions to make your sourdough bread rise beautifully every single time.
Key Takeaways
- Weak or inactive starter: A tired sourdough starter is the #1 reason bread fails to rise in the oven.
- Underproofing kills oven spring: If your dough hasn’t fermented enough, it won’t expand when it hits the heat.
- Oven temperature matters hugely: Too low, and your loaf stays flat. Too high, and the crust sets before the inside rises.
- Gluten strength is essential: Weak gluten structure means your dough can’t hold the gas it needs to rise.
- Hydration levels affect rise: Too dry or too wet dough both lead to poor oven performance.
- Scoring technique plays a role: Proper scoring allows controlled expansion and better oven spring.
- Small fixes make a big difference: Simple adjustments to timing, temperature, and technique can transform your results.
📑 Table of Contents
- Why Didnt My Sourdough Rise In The Oven Again Today
- Understanding What Makes Sourdough Rise
- The Most Common Reasons Your Sourdough Didnt Rise
- How to Fix and Prevent Rise Problems
- Quick Tips for Better Sourdough Rise
- Common Mistakes That Ruin Sourdough Rise
- When to Start Over vs When to Save the Loaf
- Expert Insights on Consistent Sourdough Rise
- Key Takeaways
- Conclusion
Why Didnt My Sourdough Rise In The Oven Again Today
You preheated the oven. You scored the loaf beautifully. You slid it into the Dutch oven with confidence. Then you waited. And waited. And opened the door to find a flat, dense brick where your beautiful sourdough bread was supposed to be. It happens to the best of us. And once you understand why, you can fix it for good.
Why didnt my sourdough rise in the oven is one of the most searched questions in the bread baking world. The answer usually comes down to a handful of common culprits. Most of them are easy to spot and even easier to correct. Whether you’re a beginner or a seasoned baker, this guide will walk you through every reason your loaf might have failed and show you exactly how to prevent it next time.
Baking sourdough at home is both an art and a science. The fermentation process, the gluten structure, the oven temperature, and the timing all work together to create that perfect rise. When one element goes wrong, the whole loaf suffers. But here’s the good news. Once you know what to look for, you can troubleshoot almost any sourdough fails situation. Let’s dig into the reasons your bread might not be rising and how to bring back that gorgeous oven spring you’ve been dreaming about.
Understanding What Makes Sourdough Rise
Before we fix the problem, let’s quickly understand how sourdough bread actually rises. Many home bakers skip this step, and it’s the reason they keep running into the same issues. When you bake sourdough, two main processes create the rise you see in the oven.
The Role of Fermentation
Your sourdough starter is a living culture of wild yeast and bacteria. During bulk fermentation, these microorganisms eat the sugars in your bread dough and produce carbon dioxide gas. That gas gets trapped inside the gluten network you’ve built through folding and shaping. The dough expands. It rises. This is the foundation of every successful loaf.
If your fermentation is weak or incomplete, your dough simply doesn’t have enough gas to expand in the oven. Think of it like blowing up a balloon. If you only blow in a tiny bit of air, the balloon stays small no matter what you do. Your sourdough loaf needs enough gas production during fermentation to have something to work with when it hits the heat.
Oven Spring Explained
Oven spring is the final burst of rising that happens when your bread dough enters a hot oven. The heat causes the remaining yeast to become active one last time. The gas inside expands rapidly. The steam from the water in your dough creates pressure. And the loaf puffs up dramatically in those first 10 to 15 minutes of baking.
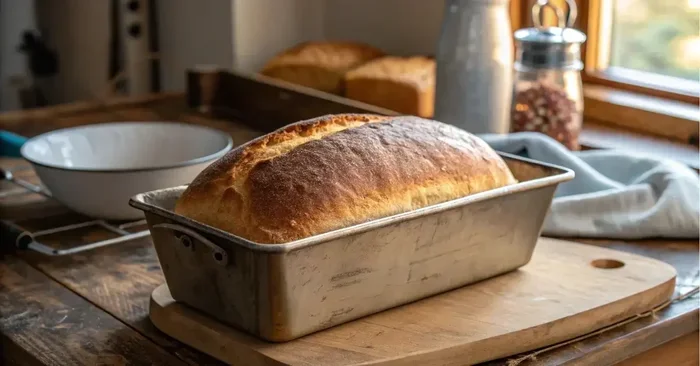
This is the magic moment every sourdough baker lives for. The top cracks open along your score marks. The sides expand. The crust forms. But here’s the catch. Oven spring only happens if your dough is ready. If it’s underproofed, overproofed, or the oven isn’t hot enough, that spring never comes. And you’re left with a flat, disappointing loaf.
The Most Common Reasons Your Sourdough Didnt Rise
Now let’s get into the real reasons your sourdough bread failed to rise in the oven. These are the problems I see most often, and they each have a clear solution.
Your Starter Wasnt Ready
The sourdough starter is the engine of your entire bake. If it’s not active and strong, nothing else matters. A weak starter means weak fermentation. Weak fermentation means less gas. Less gas means no rise.
Here’s how to tell if your starter is ready. It should double in size within 4 to 6 hours of feeding. It should pass the float test, where a small spoonful floats in water. And it should smell tangy and slightly sweet, not like plain flour or alcohol. If your starter fails any of these tests, your bread dough won’t have the lift it needs.
Many bakers make the mistake of using their starter too early after feeding. Give it time. A hungry, freshly fed starter needs several hours to build up enough yeast activity. Rushing this step is one of the top reasons sourdough troubleshooting becomes necessary later.
Underproofing the Dough
Underproofing means you shaped and baked your loaf before it had enough time to ferment. The gluten hadn’t fully relaxed. The gas pockets hadn’t developed. And when the dough hits the oven, there’s simply nothing left to expand.
Signs of underproofed bread dough include a tight, elastic texture that springs back quickly when poked. The dough feels small and dense. And after baking, the crumb is compact with very few air holes. This is the most common beginner mistake in sourdough baking.
To avoid underproofing, use the poke test. Press your floured finger about half an inch into the dough. If it springs back slowly and leaves a slight indent, it’s ready. If it snaps back instantly, give it more time. The bulk fermentation stage is where your dough builds strength and flavor. Don’t skip it or rush it.
Overproofing the Dough
Overproofing is the opposite problem, but it causes just as many sourdough fails. When dough proofs too long, the gluten structure stretches beyond its limits. The gas bubbles become too large and fragile. And once the dough goes into the oven, it collapses instead of rising.
An overproofed loaf looks slack and spread out before baking. When you press it, the indent stays. The dough feels fragile and sticky. After baking, you get a flat loaf with a gummy, dense interior and large irregular holes.
Temperature plays a huge role in overproofing. A warm kitchen speeds up fermentation dramatically. What takes 4 hours at 70°F might take just 2 hours at 80°F. Always watch your dough, not the clock. The clock gives you a guideline, but the dough tells you the truth.
Weak Gluten Development
Gluten development is what gives your sourdough loaf the strength to hold gas and expand. Without a strong gluten network, your dough spreads out instead of rising up. Think of gluten as the walls of a balloon. If the walls are thin and weak, the balloon can’t inflate properly.
Building gluten takes time and technique. Autolyse, where you mix flour and water and rest before adding salt and starter, helps develop structure. Gentle mixing and stretch-and-fold sets during bulk fermentation strengthen the gluten further. And proper shaping creates surface tension that supports oven spring.
If you skip these steps or do them too quickly, your dough structure suffers. The result is a flat, wide loaf that never achieves that beautiful rounded shape. Many sourdough troubleshooting cases trace back to insufficient gluten development.
Wrong Oven Temperature
Baking temperature is absolutely critical for sourdough bread. If your oven runs too cool, the dough won’t get that initial burst of energy it needs for oven spring. The yeast stays dormant, the gas doesn’t expand, and you get a dense brick.
Most sourdough recipes call for 450°F to 500°F. But many home ovens lie about their actual temperature. An oven thermometer is one of the cheapest and most effective tools you can buy. For under $15, it takes the guesswork out of baking bread and can transform your results overnight.
On the flip side, an oven that’s too hot can also cause problems. The crust sets too quickly, trapping the dough inside before it has a chance to expand fully. This leads to a loaf that cracks open unpredictably and doesn’t rise evenly. Finding the right temperature balance is key.
Poor Scoring Technique
Scoring isn’t just decorative. It controls where the sourdough loaf expands during oven spring. A shallow or uneven score gives the dough weak points to expand from, leading to an unpredictable shape and sometimes poor rise.
Use a sharp blade. A lame or razor works best. Score about a quarter inch deep at a 30 to 45 degree angle. The cuts should be confident and swift. Hesitant, dragging scores tear the dough surface and release gas unevenly.
Proper scoring also helps the sourdough crust form correctly. The cuts allow steam to escape in a controlled way, which helps the loaf expand rather than burst randomly. This is one of those small details that makes a surprisingly big difference in your final bake.
How to Fix and Prevent Rise Problems
Now that you know the common culprits, let’s talk solutions. Sourdough troubleshooting doesn’t have to be complicated. Most problems have simple fixes.
Revive Your Starter
If you suspect your starter is weak, feed it more frequently. Try a 1:1:1 ratio of starter, flour, and water by weight. Feed it every 12 hours for two days before baking. This builds up the yeast population and strengthens the culture. By the third day, you should have a vigorous, reliable sourdough starter ready for baking.
Also, consider the flour you use. Sourdough flour with higher protein content feeds the yeast better and produces more consistent results. Unbleached all-purpose flour or bread flour works well for maintaining a starter that’s ready to leaven your bread dough every time.
Master Your Proofing Times
Proofing times vary based on temperature, hydration, and starter strength. Instead of following a fixed timeline, learn to read your dough. Look for these signs of readiness:
- The dough has increased by 50 to 75 percent in volume.
- The surface looks smooth and slightly domed.
- It passes the poke test with a slow spring-back.
- Small bubbles form on the surface.
- The dough feels light and airy when you lift the bowl.
Cold proofing, where you refrigerate the shaped dough overnight, is another excellent technique. It slows fermentation, develops deeper flavor, and often improves oven spring the next day. Many experienced sourdough bakers swear by this method for more consistent results.
Optimize Your Oven Setup
For the best oven spring, preheat your oven and Dutch oven for at least 30 to 45 minutes. The pot needs to be screaming hot before the dough goes in. Place a pan of water on a lower rack to create steam, which keeps the crust soft during the initial bake and allows maximum expansion.
Bake covered for the first 20 minutes to trap steam. Then remove the lid and reduce the temperature to 425°F to 450°F for the remaining 20 to 25 minutes. This two-stage process gives your sourdough bread the best chance for a dramatic rise and a beautifully crisp sourdough crust.
Build a Stronger Dough
If your gluten development needs work, add more stretch-and-fold sets during bulk fermentation. Four sets spaced 30 minutes apart is a great starting point. This builds the protein structure without overworking the dough.
Also check your dough hydration. A very high hydration dough (above 80 percent) is harder to handle and can spread instead of rising. If you’re struggling, try reducing hydration by 2 to 3 percent and see if your sourdough loaf holds its shape better.
Quick Tips for Better Sourdough Rise
Here are some fast, actionable tips you can use right away to improve your sourdough bread results:
- Always use an oven thermometer to verify your actual temperature.
- Feed your starter 4 to 6 hours before mixing the dough for maximum activity.
- Use the poke test instead of the clock to judge proofing.
- Score your dough confidently and at the right depth.
- Steam in the first 20 minutes of baking is non-negotiable for good spring.
- Let your shaped dough rest at room temperature for 30 minutes before scoring.
- Keep notes on every bake. Temperature, timing, and results help you improve over time.
Common Mistakes That Ruin Sourdough Rise
Even experienced bakers fall into traps that hurt their sourdough loaf. Here are the mistakes I see most often:
Skipping the Autolyse
The autolyse is a simple rest period after mixing flour and water. It gives the gluten time to start developing before you add the starter and salt. Skipping this step means your bread dough has to work harder during mixing, and the gluten network ends up weaker. A 30 to 60 minute autolyse can dramatically improve your dough’s ability to rise.
Using Cold Ingredients
Cold dough from the fridge takes longer to heat up in the oven. By the time the center reaches the right temperature, the yeast has run out of steam. If you’re refrigerating your shaped loaf for cold proofing, let it come to room temperature before baking. This small step can be the difference between a great rise and a flat result.
Opening the Oven Too Early
Resist the urge to check on your loaf during the first 15 to 20 minutes. Every time you open the oven door, you lose heat and steam. Both are essential for oven spring. Trust the process. Set a timer and wait. The first 15 minutes are when all the magic happens.
Ignoring Your Flour
Not all flours are created equal. Protein content varies between brands and even between bags from the same brand. A flour with 11 to 13 percent protein works best for sourdough bread. Lower protein flours produce weaker gluten and less rise. Check your flour’s protein content if you’re consistently getting flat loaves.
When to Start Over vs When to Save the Loaf
Sometimes a failed loaf isn’t the end of the world. A dense sourdough still tastes great as toast or breadcrumbs. But knowing when to troubleshoot versus when to start fresh saves you time and frustration.
If your loaf is flat but the inside tastes good, you likely had an underproofing or temperature issue. Adjust those variables next time. If the loaf collapsed completely and tastes sour or gummy, you probably overproofed. Shorten your proofing time and try again. If the loaf never rose at all, your starter is likely the problem. Revive it and retest before baking again.
Remember, every failed bake teaches you something. Even professional sourdough bakers have off days. The key is to identify what went wrong, make one adjustment, and try again. Persistence is what separates good bakers from great ones.
Expert Insights on Consistent Sourdough Rise
I spoke with several experienced sourdough bakers about their biggest breakthroughs in achieving reliable oven spring. The consensus was clear. It’s not one big fix. It’s a combination of small, consistent habits that add up over time.
One baker emphasized the importance of tracking ambient temperature. “I started noting the room temperature and humidity every time I bake,” she said. “Within two weeks, I could predict exactly how my dough would behave. My sourdough bread started rising consistently.”
Another expert stressed the value of a baking stone or steel. “A preheated stone stores more heat than a Dutch oven alone,” he explained. “It gives the bottom of the loaf that initial burst of heat it needs to start rising the moment it goes in.”
The takeaway is clear. Pay attention to the details. Small improvements in your process compound into dramatically better results. Your sourdough loaf will reward you for the care and attention you put into every step.
Key Takeaways
- A strong, active starter is the foundation of every successful rise. Feed it regularly and use it when it’s at peak activity.
- Proofing time matters more than the clock. Use the poke test and visual cues to judge when your dough is ready.
- Oven temperature must be accurate. An oven thermometer is the single best investment for consistent results.
- Gluten development through proper folding and shaping gives your dough the strength to rise in the oven.
- Steam and high heat in the first 20 minutes create the conditions for dramatic oven spring.
- Scoring technique controls expansion and prevents unpredictable bursting or poor rise.
- Every failed bake is a learning opportunity. Adjust one variable at a time and track your progress.
Conclusion
Why didnt my sourdough rise in the oven is a question with a clear answer. Most of the time, it comes down to one of a few fixable issues. Your starter might need reviving. Your proofing might be off. Your oven might not be hot enough. Or your dough structure might need more development. Whatever the cause, you now have the knowledge to identify and fix it.
Baking great sourdough bread takes practice. But it also takes understanding. Now that you know how fermentation, gluten, temperature, and proofing all work together, you can approach each bake with confidence. Make small adjustments. Keep notes. Trust the process. And most importantly, don’t get discouraged by a flat loaf.
Every sourdough baker has been there. The key is to keep going. Apply what you’ve learned here. Watch your dough closely. Feel its texture. Smell its aroma. And soon, you’ll open that oven door to find exactly what you’ve been hoping for. A beautifully risen sourdough loaf with a crisp sourdough crust and an open, airy crumb. It’s waiting for you. Just keep baking.
Frequently Asked Questions
Can an old or weak sourdough starter cause my bread not to rise?
Absolutely. Your sourdough starter is responsible for producing the gas that makes your bread dough rise. If it’s old, inactive, or hasn’t been fed properly, it won’t generate enough yeast activity. Always make sure your starter passes the float test and has doubled in size after feeding before you use it in your sourdough recipe.
How do I know if my sourdough is underproofed or overproofed?
An underproofed loaf feels tight and springs back quickly when poked. The crumb is dense with small, uneven holes. An overproofed loaf feels slack and fragile. When pressed, the indent stays. The crumb has large, irregular holes and can taste overly sour. Use the poke test and visual cues to tell the difference.
What oven temperature is best for sourdough oven spring?
Most sourdough bread bakes best at 450°F to 500°F. The high heat creates rapid steam inside the dough, which drives the final burst of expansion. Always preheat your oven and Dutch oven for at least 30 minutes. Use an oven thermometer to verify the actual temperature, since many home ovens run cooler than their dial suggests.
Does scoring really affect how much sourdough rises?
Yes, scoring plays a significant role in controlled expansion. A proper score gives the bread dough a predetermined place to expand during oven spring. Without a good score, the loaf may burst unpredictably or expand unevenly. Score about a quarter inch deep at a 30 to 45 degree angle with a confident, swift motion.
Can I use a regular oven instead of a Dutch oven for sourdough?
Yes, but a Dutch oven traps steam and heat much more effectively, which is essential for great oven spring. If you don’t have one, you can use a baking stone or steel with a pan of water placed below to create steam. The key is maintaining high heat and humidity during the first 20 minutes of baking.
Why did my sourdough rise fine on the counter but collapse in the oven?
This is a classic sign of overproofing. Your dough fermented enough at room temperature but continued to expand in the oven until the gluten structure couldn’t hold it anymore. The loaf collapsed. Next time, reduce your proofing time slightly or proof at a cooler temperature. Also make sure your oven is fully preheated before the dough goes in.
=== CONCLUSION ===
Why didnt my sourdough rise in the oven doesn’t have to be a mystery anymore. The reasons are clear, the fixes are simple, and the solutions are within your reach. From strengthening your sourdough starter to nailing your proofing times, from checking your oven temperature to improving your gluten development, each piece of the puzzle is something you can control. Start with one or two adjustments and build from there. Your next sourdough loaf will thank you.