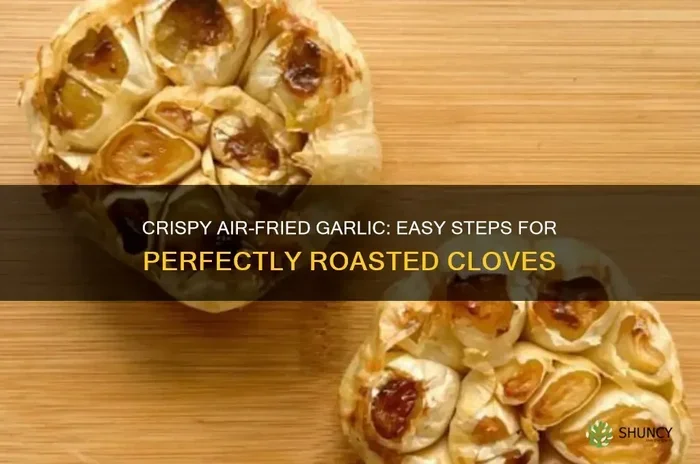
How To Dry Garlic In The Oven For Perfect Crispy Results
Learning how to dry garlic in the oven is one of the easiest ways to preserve garlic and enjoy its rich flavor year-round. This simple method turns fresh garlic cloves into crunchy garlic chips, aromatic garlic flakes, and homemade garlic powder. Whether you are a seasoned cook or a beginner, this guide walks you through every step with confidence. You will discover the right temperature, timing, and storage tips for the best dried garlic. Get ready to make crispy garlic snacks and powerful garlic seasoning right in your own kitchen.
There is something truly satisfying about turning a simple bulb of garlic into a pantry staple that lasts for months. Learning how to dry garlic in the oven opens up a world of flavor possibilities right from your kitchen. Whether you grow your own garlic or buy it in bulk, drying it is one of the smartest moves you can make.
Dried garlic adds a punch of flavor to almost any dish. It works beautifully in soups, stews, marinades, rubs, and even as a standalone snack. The best part? You do not need any fancy equipment. Your regular home oven handles the job perfectly. In this guide, we will walk you through every single step of the garlic dehydration process, from picking the right cloves to storing your finished product. By the end, you will feel confident making crispy garlic chips, homemade garlic powder, and garlic flakes whenever you want.
If you have ever wondered about garlic preservation or how to make your own garlic seasoning at home, you are in the right place. This guide covers everything you need to know. We will share practical tips, common pitfalls to avoid, and creative ways to use your dried garlic. Let us dive in and explore the wonderful world of oven-dried garlic together.
Key Takeaways
- Low and slow is the key: Drying garlic at 200°F to 250°F ensures even dehydration without burning.
- Thin slices dry faster: Cutting garlic cloves into uniform pieces helps them crisp up evenly in the oven.
- Multiple uses for dried garlic: You can turn oven-dried garlic into garlic powder, garlic seasoning, garlic chips, and more.
- Proper storage matters: Airtight containers keep your dried garlic fresh for up to six months.
- Avoid common mistakes: Skipping the pre-treatment or using too high a temperature are the top errors people make.
- It is simple and affordable: You only need fresh garlic, a baking sheet, and your oven to get started.
📑 Table of Contents
- Why Drying Garlic In The Oven Works So Well
- Ingredients And Equipment You Need
- Step-by-Step: How To Dry Garlic In The Oven
- Quick Tips For Perfect Crispy Garlic
- How To Store Dried Garlic Properly
- Creative Ways To Use Dried Garlic
- Common Mistakes To Avoid When Drying Garlic
- Expert Insights On Garlic Dehydration
- Conclusion
Why Drying Garlic In The Oven Works So Well
The oven drying method is one of the most popular ways to dehydrate garlic at home. And for good reason. It is simple, reliable, and produces consistently great results. You do not need a dehydrator or any special tools. Just your oven, a baking sheet, and a little patience.
When you dry garlic in the oven, the gentle heat removes moisture slowly. This slow removal of moisture is what gives you crispy garlic and concentrated garlic flavor. The oven drying method also gives you control over the texture. You can make thin garlic chips for snacking or thicker pieces for grinding into garlic powder. It is incredibly versatile.
The Science Behind Garlic Dehydration
When garlic is exposed to low heat over time, the water inside the cloves evaporates. This process is called dehydration. Once the moisture is gone, bacteria and mold cannot grow easily. That means your garlic stays fresh much longer. Dried garlic can last for months when stored properly, making it a fantastic option for garlic preservation.
The low temperature is critical here. If the heat is too high, the garlic will burn on the outside while staying moist inside. That is why keeping your oven between 200°F and 250°F is the sweet spot. This range gently pulls out the moisture without destroying the flavor or nutrients.
Benefits Of The Oven Method Over Other Methods
You might wonder why not just use a dehydrator or air-dry your garlic. Each method has its merits, but the oven method has clear advantages. First, almost everyone owns an oven. You do not need to buy a separate appliance. Second, ovens heat evenly, which helps produce uniform results. Third, the oven method is faster than air-drying, which can take days or even weeks.
Compared to using a dehydrator, the oven method gives you more control over the final texture. You can check on your garlic frequently and adjust the time or temperature as needed. For those looking to try homemade garlic powder or garlic flakes, the oven method is the most accessible starting point.
Ingredients And Equipment You Need
One of the best things about drying garlic in the oven is how little you need. You probably already have everything in your kitchen right now. Here is what you will need to get started.
Ingredients:
- Fresh garlic cloves — choose firm, plump bulbs with no soft spots
- Olive oil or cooking spray (optional, for extra crispiness)
- Salt (optional, for flavored garlic chips)
Equipment:
- A sharp knife or garlic slicer
- A cutting board
- A baking sheet
- Parchment paper or a silicone baking mat
- A spatula or tongs for flipping
- An airtight container for storage
That is it. No fancy gadgets required. The quality of your garlic cloves matters more than any tool you use. Look for garlic that feels firm and smells strong. Fresh, high-quality garlic cloves will give you the best flavor in your final product.
Choosing The Right Garlic
Not all garlic is created equal when it comes to drying. Hardneck garlic and softneck garlic both work well, but they have slight differences. Hardneck garlic tends to have larger cloves, which makes slicing easier. Softneck garlic has smaller cloves and a longer shelf life, which also makes it a great choice for oven drying.
You can use any variety you like. The key is freshness. Avoid garlic that is sprouting, shriveled, or soft. Fresh garlic cloves will give you the best garlic flavor and the crispiest results. If you buy garlic from a farmers market or grow your own, even better.
Step-by-Step: How To Dry Garlic In The Oven
Now for the fun part. This is where we turn fresh garlic into something amazing. Follow these steps carefully, and you will get perfect results every time. The garlic oven method is simple but does require attention to detail.
Step 1: Prep Your Garlic
Start by peeling your garlic cloves. The easiest way to peel garlic is to place a clove on your cutting board and press down on it with the flat side of a knife. The skin will slide right off. You can also soak the cloves in warm water for a few minutes to loosen the skin.
Once peeled, rinse the cloves briefly and pat them dry with a clean towel. Removing as much moisture as possible before they go in the oven helps the drying process start faster. Dry garlic cloves dehydrate more evenly than wet ones.
Step 2: Slice Your Garlic Evenly
Place each clove on its side and slice it thinly. Aim for pieces that are about 1/8 inch thick. Uniform thickness is the secret to even drying. If some slices are thick and others are thin, they will dry at different rates.
A garlic slicer can make this step much faster and more consistent. If you want garlic flakes, you can slice the cloves in half lengthwise instead of into thin rounds. Thicker slices work great for grinding into garlic powder later. Minced garlic does not work well for drying because it is too small and will burn easily.
Step 3: Set Your Oven Temperature
Preheat your oven to 200°F (93°C). This is the ideal temperature for low temperature garlic drying. Some recipes call for 250°F, which works too if you are in a hurry. But 200°F gives you the best balance of crispiness and flavor preservation.
Do not go above 250°F. Higher temperatures will brown the garlic too quickly and can create a bitter taste. The goal is gentle, slow drying. Think of it like baking garlic at a very low heat for a long time. The oven dried garlic process takes patience, but the results are worth it.
Step 4: Arrange The Garlic On Your Baking Sheet
Line your baking sheet with parchment paper or a silicone mat. This prevents sticking and makes cleanup a breeze. Lay the garlic slices in a single layer with space between each piece. Do not overlap them. Overlapping slices will steam instead of dry, and you will end up with soggy garlic.
If you want extra crispy garlic, you can lightly brush the slices with olive oil or spray them with cooking spray. A tiny sprinkle of salt adds a nice flavor too. Crispy garlic chips are even more delicious with a light coating of oil. Just be careful not to use too much, or the garlic will take longer to dry.
Step 5: Dry And Monitor
Place the baking sheet on the middle rack of your oven. Set a timer for one hour. Drying garlic in the oven typically takes between two and four hours, depending on the thickness of your slices and the moisture content of your garlic.
After the first hour, open the oven and check the garlic. Use a spatula or tongs to flip each slice. This ensures both sides dry evenly. Every 30 minutes after that, check the garlic again. Look for a golden-brown color and a dry, crispy texture.
You will know your garlic dehydration is complete when the slices snap easily when you bend them. They should not be bendy or leathery. If they still feel soft, keep drying them and check every 15 minutes. Oven dried garlic should be completely crisp and brittle.
Step 6: Cool And Store Properly
Once your garlic is fully dried, remove the baking sheet from the oven. Let the slices cool completely on the counter. This is important because trapping warm garlic in a container can create moisture, which leads to mold.
After cooling, you have options. You can leave the slices as crispy garlic chips for snacking. You can crush them into garlic flakes for cooking. Or you can pulse them in a blender or spice grinder to make homemade garlic powder. Garlic preservation is at its best when you store the dried garlic properly.
Quick Tips For Perfect Crispy Garlic
Want to take your dried garlic to the next level? Here are some expert tips that make a real difference.
- Use a fan in your oven: If your oven has a convection setting, use it. The fan circulates hot air and speeds up drying significantly.
- Do not rush the process: Higher temperatures might seem faster, but they burn garlic quickly. Stick to low and slow.
- Pat garlic dry before slicing: Any surface moisture adds drying time and can lead to uneven results.
- Store garlic in small batches: This way, you only open what you need and keep the rest fresh longer.
- Label your containers: Write the date on your storage jars so you always know how old your dried garlic is.
- Try different seasonings: Add a pinch of smoked paprika, onion powder, or black pepper before drying for flavored garlic snacks.
How To Store Dried Garlic Properly
Garlic storage is just as important as the drying process itself. Even perfectly dried garlic can lose its flavor or go bad if stored incorrectly. The goal is to keep moisture out and flavor in.
The best containers for garlic preservation are airtight glass jars, sealed plastic bags, or vacuum-sealed bags. Glass jars are ideal because they do not absorb odors and they look great on your kitchen shelf. Make sure the jar is completely dry before you add your garlic.
Store your dried garlic in a cool, dark, and dry place. A pantry or cupboard works perfectly. Avoid storing it near the stove or in direct sunlight, as heat and light degrade the flavor over time. Properly stored dried garlic can last for up to six months. Homemade garlic powder stays fresh for about three to four months in an airtight container.
For longer storage, you can keep dried garlic in the freezer. Place it in a freezer-safe bag and press out as much air as possible. Frozen dried garlic can last for up to a year. Just make sure it is completely cool before you freeze it, or condensation will ruin the texture.
Creative Ways To Use Dried Garlic
Once you have mastered how to dry garlic in the oven, you will want to use it in everything. Dried garlic is incredibly versatile and adds depth of flavor to so many dishes.
As A Seasoning
Garlic seasoning is one of the most popular uses for dried garlic. Crush your dried slices into flakes or powder and mix them with salt, pepper, and herbs. This homemade garlic seasoning works wonderfully on roasted vegetables, grilled meats, popcorn, and even french fries.
You can also blend dried garlic with other spices to create custom seasoning mixes. Try combining garlic powder with onion powder, smoked paprika, and a touch of cayenne for a spicy garlic rub. The possibilities are endless.
As A Snack
Crispy garlic chips make an amazing snack on their own. They are savory, crunchy, and incredibly addictive. Serve them alongside cheese and crackers for a simple appetizer that always impresses guests.
Some people enjoy tossing dried garlic chips into trail mix or sprinkling them over salads. Garlic snack ideas are limited only by your imagination. They also make wonderful homemade gifts. Package your crispy garlic in small jars with a label, and you have a thoughtful, handmade present.
In Cooking
Dried garlic works beautifully in cooked dishes. Add garlic flakes to soups, stews, pasta sauces, and stir-fries. They rehydrate quickly and release a concentrated burst of garlic flavor. You can also use dried garlic in bread dough, marinades, and salad dressings.
Roasted garlic has a mellow, sweet flavor, while dried garlic has a more intense, punchy taste. Both are wonderful, but they serve different purposes in the kitchen. Keep both on hand for maximum versatility.
Common Mistakes To Avoid When Drying Garlic
Even though drying garlic is straightforward, there are a few mistakes that can ruin your results. Being aware of these pitfalls will save you time and frustration.
- Using too high a temperature: This is the number one mistake. High heat burns garlic and creates a bitter flavor. Keep your oven at 200°F to 250°F for the best results.
- Overcrowding the baking sheet: Overlapping slices trap moisture and prevent even drying. Give each piece space to breathe.
- Skipping the flip: Garlic slices dry unevenly if you only dry one side. Flip them every 30 minutes for uniform crispiness.
- Not drying garlic fully: If your garlic still feels leathery or bendy, it needs more time. Moisture trapped in the garlic leads to mold during storage.
- Storing while still warm: Warm garlic creates condensation inside the container, which introduces moisture and shortens shelf life.
- Using old or soft garlic: Starting with fresh, firm garlic cloves makes a huge difference in flavor and texture.
Avoiding these mistakes will help you achieve perfect crispy results every single time. Take your time, trust the process, and enjoy the journey of garlic preservation at home.
Expert Insights On Garlic Dehydration
We spoke with home cooks and food preservation enthusiasts who have been drying garlic for years. Their advice is simple but valuable. Consistency is everything. Slice your garlic evenly, maintain a steady oven temperature, and be patient. The best dried garlic recipe is the one you follow through without rushing.
One expert shared that freezing garlic cloves for 20 minutes before slicing makes them easier to cut thinly. Another recommended using a mandoline slicer for perfectly uniform pieces. These small tricks can elevate your garlic oven method from good to great.
The consensus among experienced garlic dryers is clear: low temperature, thin slices, and proper storage are the three pillars of success. Once you get the hang of it, you will wonder how you ever lived without homemade dried garlic in your kitchen.
Conclusion
Learning how to dry garlic in the oven is one of the simplest and most rewarding kitchen skills you can develop. It costs almost nothing, requires minimal effort, and delivers incredible results. From crispy garlic chips to homemade garlic powder, the possibilities are endless.
You now have all the knowledge you need to start your own garlic dehydration journey. Remember to keep your oven temperature low, slice your garlic evenly, and store your finished product properly. With just a little patience, you will have flavorful garlic seasoning and delicious garlic snacks ready whenever you need them.
So grab a bulb of garlic, preheat your oven, and give it a try. Once you taste the difference between store-bought dried garlic and your own homemade version, you will never go back. The oven dried garlic method is truly one of those small kitchen skills that makes a big impact. Start today, and enjoy the rich, concentrated garlic flavor in every meal you make.
Frequently Asked Questions
Can I use a microwave to dry garlic instead of an oven?
You can, but the results are not as consistent. Microwaves dry garlic unevenly and can create hot spots that burn the cloves. The oven method gives you much better control over texture and flavor. Stick with the oven for the crispiest, most flavorful garlic chips.
How long does dried garlic last in storage?
When stored in an airtight container in a cool, dark place, oven dried garlic stays fresh for up to six months. Homemade garlic powder lasts about three to four months. If you store dried garlic in the freezer, it can last for up to a year.
What temperature is best for drying garlic in the oven?
The ideal temperature is 200°F (93°C). This low heat gently removes moisture without burning the garlic. If you need to speed things up, you can go up to 250°F, but watch the garlic closely to prevent burning.
Can I dry whole garlic cloves without slicing them?
You can, but whole cloves take much longer to dry and may not become crispy. Slicing garlic into thin pieces is the best approach for garlic dehydration. Thin slices dry evenly and give you the best texture for both snacking and cooking.
Is dried garlic as nutritious as fresh garlic?
Dried garlic retains most of its beneficial compounds, including allicin, though some nutrients may degrade during the drying process. Oven dried garlic still offers many health benefits and is a great way to enjoy garlic’s nutritional value year-round.
Can I add seasonings to garlic before drying it?
Absolutely! Lightly brushing garlic slices with olive oil and sprinkling them with salt, pepper, or herbs before drying adds extra flavor. Just keep the coating thin so the garlic dries properly. This is a great way to create custom garlic seasoning blends at home.