How Long To Cook 4 Lb Roast In Oven And Get It Perfect
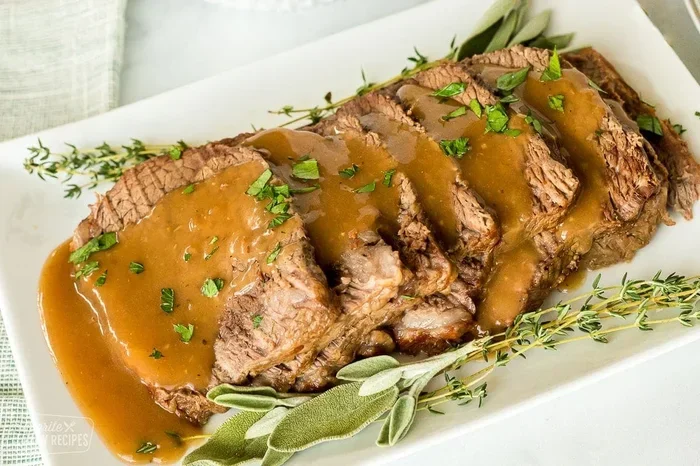
Cooking a 4 lb roast in the oven takes about 1 to 1.5 hours at 325°F to 350°F, depending on the cut and desired doneness. The key is using a meat thermometer to hit the right internal temperature and letting the roast rest before slicing. With the right seasoning and oven temperature, you will pull out a perfectly juicy roast every single time.
Cooking a roast in the oven is one of the most rewarding things you can do in the kitchen. Whether you are feeding a family or hosting a dinner party, a 4 lb roast is the perfect size. It feeds a crowd without being overly complicated. But one question keeps coming up again and again: how long to cook 4 lb roast in oven?
The answer depends on a few things. The type of meat you are cooking matters. The oven temperature matters too. And honestly, how well-done you like your roast makes a big difference as well. In this guide, we will walk you through everything you need to know. By the end, you will feel confident enough to roast like a pro.
Key Takeaways
- Cooking time: A 4 lb roast needs roughly 60 to 90 minutes at 325°F to 350°F.
- Internal temperature matters most: 135°F for medium-rare, 145°F for medium, and 160°F for well-done.
- Sear first, then roast: Searing adds flavor and helps create a beautiful crust.
- Rest the roast: Always let it rest for 15 to 20 minutes before cutting.
- Use a meat thermometer: This is the single best tool for perfect doneness.
- Low and slow works best: Lower temperatures keep the roast juicy and tender.
📑 Table of Contents
- How Long To Cook 4 Lb Roast In Oven — The Basics
- Best Oven Temperature For A 4 Lb Roast
- Step-By-Step Guide To Roasting A 4 Lb Roast
- How To Know When Your Roast Is Done
- Tips For A Perfectly Juicy Roast Every Time
- Common Mistakes To Avoid When Roasting
- How Different Cuts Of Beef Roast Compare
- How Long To Cook 4 Lb Roast In Oven For Different Doneness Levels
- Final Thoughts On Cooking A 4 Lb Roast
How Long To Cook 4 Lb Roast In Oven — The Basics
Let us start with the big question. When people ask how long to cook 4 lb roast in oven, they usually want a simple number. And here it is. At 325°F, a 4 lb roast takes about 1 hour to 1 hour and 30 minutes. At 350°F, it may take a bit less time, around 55 minutes to 1 hour and 15 minutes.
But those numbers are just starting points. Several factors can change your cooking time. The cut of meat plays a huge role. A beef chuck roast behaves differently than a pork loin or a boneless leg of lamb. Fat content, bone-in versus boneless, and even the shape of the roast all matter.
Here is a general rule of thumb for roast cooking time per pound:
- Beef roast: About 20 to 25 minutes per pound at 325°F.
- Pork roast: About 25 to 30 minutes per pound at 325°F.
- Lamb roast: About 20 to 25 minutes per pound at 325°F.
These numbers give you a solid baseline. But always use a meat thermometer. It removes all the guesswork. More on that later.
Why Timing Varies
You might have followed a recipe to the letter and still ended up with a roast that was over or undercooked. This happens more often than you think. The reason is simple. Every oven heats differently. Some ovens run hot, and some run cold. Even the type of roasting pan you use can affect how heat circulates around the meat.
Another factor is the starting temperature of the roast. If you take the meat straight from the refrigerator, it will take longer to cook through. Letting it sit at room temperature for 30 to 45 minutes before roasting can help it cook more evenly.
Best Oven Temperature For A 4 Lb Roast
Temperature is the second most important factor after time. Too high, and the outside burns before the inside cooks. Too low, and you end up waiting forever. So what is the sweet spot?
Most experts agree that 325°F is the best oven temperature for a 4 lb roast. It strikes a perfect balance between cooking time and moisture retention. The roast cooks evenly, the exterior develops a lovely crust, and the inside stays tender and juicy.
Here is a quick look at how temperature affects your roast:
- 300°F: Low and slow. Great for tougher cuts like chuck roast. Cooking time increases to about 1.5 to 2 hours.
- 325°F: The gold standard. Works well for almost any roast. Reliable and forgiving.
- 350°F: Slightly faster. Good for tender cuts like pork loin or beef tenderloin.
- 400°F and above: Best for searing first, then reducing temperature. Not ideal for the full cook on its own.
The Low And Slow Method
If you have a tougher cut of meat, try the low and slow roasting method. Set your oven to 300°F and cook the roast for about 2 hours. The lower temperature breaks down the connective tissues more gently. This results in a roast that falls apart with a fork.
This method works especially well for beef chuck roast and pork shoulder. You sacrifice some time, but you gain incredible tenderness. Many home cooks swear by this approach for Sunday dinners and holiday meals.
Step-By-Step Guide To Roasting A 4 Lb Roast
Now that you know the time and temperature, let us walk through the actual process. Following these steps will give you consistent, delicious results every time.
Step 1: Prep The Roast
Take your roast out of the refrigerator about 30 to 45 minutes before cooking. Pat it dry with paper towels. Moisture on the surface prevents a good sear. Next, season generously with salt, pepper, and any spices you enjoy. Garlic powder, smoked paprika, and rosemary work beautifully on most roasts.
Step 2: Sear The Roast
Searing is not optional if you want the best flavor. Heat a large skillet or Dutch oven over medium-high heat. Add a tablespoon of oil. Once the oil is shimmering, place the roast in the pan. Let it brown on all sides, about 2 to 3 minutes per side.
Searing creates a Maillard reaction, which is just a fancy way of saying it builds deep, rich flavor. That crust on the outside makes a huge difference in the final taste.
Step 3: Place In The Oven
Transfer the seared roast to a roasting pan or a baking dish. If you have a rack, use it. It allows air to circulate underneath and promotes even cooking. Insert an oven-safe meat thermometer into the thickest part of the roast. Make sure it does not touch the bottom of the pan.
Place the pan in the oven on the middle rack. Set your timer based on the guidelines we shared earlier. Resist the urge to open the oven door too often. Every time you open it, heat escapes and cooking time increases.
Step 4: Check The Internal Temperature
Start checking the temperature about 15 minutes before the estimated finish time. This is where the meat thermometer earns its keep. Here are the target temperatures for different levels of doneness:
- Rare: 120°F to 125°F
- Medium-Rare: 130°F to 135°F
- Medium: 140°F to 145°F
- Medium-Well: 150°F to 155°F
- Well-Done: 160°F and above
Remember that the temperature will rise 5 to 10 degrees after you pull the roast out. This is called carryover cooking. It is why many chefs pull the roast a few degrees below the target.
Step 5: Rest And Serve
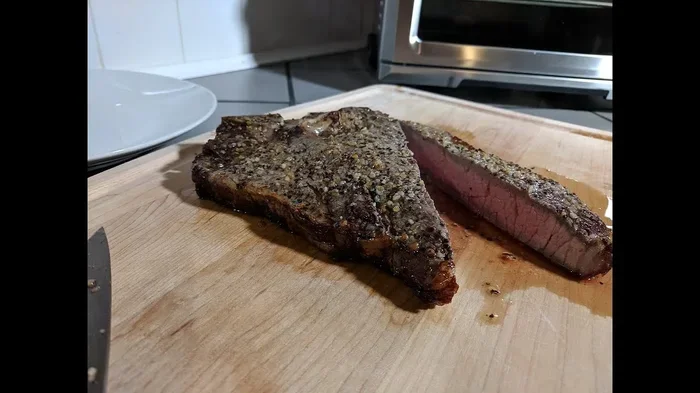
Once the roast hits the right temperature, take it out of the oven. Place it on a cutting board and tent it loosely with aluminum foil. Let it rest for 15 to 20 minutes. This step is crucial. During resting, the juices redistribute throughout the meat. If you skip this and cut right away, the roast will be dry and less flavorful.
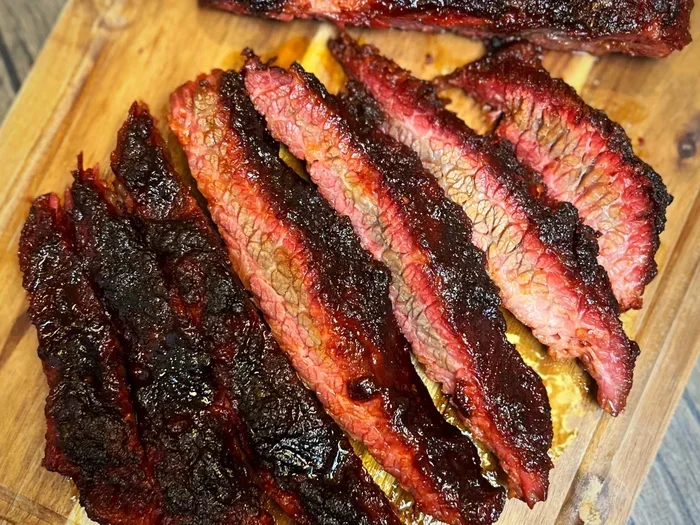
After resting, carve against the grain for the most tender slices. Serve with the pan juices, roasted vegetables, or your favorite sides.
How To Know When Your Roast Is Done
Knowing when a roast is done goes beyond just time. Time is a guide, not a guarantee. The real indicator is the internal temperature. But there are other signs too.
A properly cooked roast should feel firm but slightly springy when you press it with your finger. If it feels very soft and mushy, it needs more time. If it feels rock hard, you have gone too far.
Another sign is the juices. When you pierce the thickest part of the roast, the juices should run clear, not pink or red. For beef, a slight pink tint is fine if you prefer medium-rare. But for pork, the juices should always be clear.
Using A Meat Thermometer Correctly
Not all meat thermometers are created equal. Dial thermometers are affordable and work well, but digital instant-read thermometers give you faster and more accurate readings. Insert the probe into the center of the thickest part. Avoid bones, fat pockets, or the bottom of the pan.
If you are using a leave-in probe thermometer, you can monitor the temperature from start to finish without opening the oven. This is a game-changer for busy cooks who want to relax while the roast does its thing.
Tips For A Perfectly Juicy Roast Every Time
Getting a juicy roast is about more than just time and temperature. Small details make a big difference. Here are some tips that separate good roasts from great ones.
- Bring the roast to room temperature first. This helps it cook evenly from edge to center.
- Do not skip the sear. That golden-brown crust adds flavor and texture.
- Add liquid to the pan. A cup of beef broth, wine, or water keeps the bottom from burning and creates a great base for gravy.
- Baste the roast halfway through. Spoon the pan juices over the top. This adds moisture and flavor.
- Use a wire rack. It lifts the roast off the pan and allows heat to reach all sides.
- Do not overcook. Pull the roast early and let carryover cooking do the rest. It is much easier to add a few more minutes than to fix a dried-out roast.
Seasoning Ideas For Different Roasts
The seasoning you choose can transform your roast. Here are a few combinations to try:
>
- Classic Beef: Salt, pepper, garlic, and fresh rosemary.
- Mediterranean: Olive oil, lemon zest, oregano, and thyme.
- Asian-Inspired: Soy sauce, ginger, garlic, and a touch of honey.
- Smoky BBQ: Smoked paprika, cumin, brown sugar, and chili powder.
Rub the seasoning all over the roast and into any crevices. The more surface area you cover, the more flavor you get.
Common Mistakes To Avoid When Roasting
Even experienced cooks make mistakes. Knowing what to avoid saves you time, money, and a lot of frustration.
Skipping the Rest Period
This is the number one mistake people make. Cutting into the roast immediately after pulling it from the oven releases all the juices. The meat dries out fast. Give it at least 15 minutes under a loose foil tent. Your patience will be rewarded with a much juicier result.
Using the Wrong Pan
A dark, non-stick pan absorbs more heat and can cause the bottom to burn. A light-colored metal roasting pan or stainless steel works best. Glass pans also work but may require a slightly lower temperature since glass retains heat differently.
Not Accounting for Oven Hot Spots
Most ovens have hot spots. The back or the top tends to run hotter. To avoid uneven cooking, rotate the pan halfway through the cooking time. If you have a convection oven, reduce the temperature by about 25°F and check earlier than the estimated time.
Over-Seasoning or Under-Seasoning
A 4 lb roast needs a generous amount of seasoning. Do not be shy with the salt. Under-seasoned roast tastes bland no matter how perfectly you cook it. On the flip side, too much spice can overpower the natural flavor of the meat. Balance is key.
Ignoring the Meat Thermometer
Relying solely on time is a recipe for inconsistency. Every oven, every roast, and every cut is slightly different. A meat thermometer takes the guesswork out of the equation. It is the single best investment you can make for consistent roasting results.
How Different Cuts Of Beef Roast Compare
Not all roasts are created equal. The cut you choose affects both cooking time and the final texture. Here is a quick comparison of popular roast cuts.
| Cut | Cooking Time (4 lb) | Best Temp | Texture |
|---|---|---|---|
| Beef Chuck Roast | 1.5 to 2 hours | 325°F | Tender, fall-apart |
| Beef Round Roast | 1 to 1.5 hours | 325°F | Lean, firm |
| Pork Loin Roast | 1 to 1.25 hours | 325°F | Juicy, tender |
| Leg of Lamb | 1 to 1.5 hours | 325°F | Rich, flavorful |
| Beef Sirloin Roast | 45 min to 1 hour | 350°F | Tender, juicy |
As you can see, the cooking time varies quite a bit depending on the cut. Tougher cuts with more connective tissue need more time and lower temperatures. Leaner cuts cook faster and do well at slightly higher temperatures.
How Long To Cook 4 Lb Roast In Oven For Different Doneness Levels
Your preferred level of doneness changes the target internal temperature, which in turn affects how long the roast stays in the oven. Here is a detailed breakdown for a 4 lb beef roast at 325°F:
- Rare (120°F to 125°F): About 55 minutes to 1 hour.
- Medium-Rare (130°F to 135°F): About 1 hour to 1 hour and 15 minutes.
- Medium (140°F to 145°F): About 1 hour and 15 minutes to 1 hour and 30 minutes.
- Well-Done (160°F+): About 1 hour and 30 minutes to 2 hours.
These times are approximate. Always rely on the thermometer. Remember that the temperature will rise after you pull the roast from the oven. So if you want medium-rare, pull it out at 130°F and let carryover cooking bring it to 135°F.
Final Thoughts On Cooking A 4 Lb Roast
Cooking a 4 lb roast in the oven is simpler than most people think. The key is understanding your time, temperature, and internal doneness. With the right approach, you can turn a basic cut of meat into a show-stopping centerpiece for any meal.
Start with a good cut of meat. Season it well. Sear it for flavor. Cook it at the right temperature. Use a meat thermometer to check doneness. And never, ever skip the resting period.
Once you master these steps, you will never look at a roast the same way again. You will adjust times and temperatures based on the cut, the oven, and your personal preference. And that is exactly how cooking should be. Fun, rewarding, and full of delicious results.
So next time someone asks you how long to cook 4 lb roast in oven, you will have the answer. More importantly, you will know exactly how to get it right every single time.
Frequently Asked Questions
Can I cook a 4 lb roast at 400°F instead of 325°F?
Yes, you can, but the cooking time will be shorter, around 45 minutes to 1 hour. Higher temperatures cook faster but also dry out the meat more quickly. If you choose this route, watch the roast closely and use a thermometer to avoid overcooking.
Should I cover the roast with foil while cooking?
Generally, no. Leaving the roast uncovered allows the exterior to brown and form a crust. You can cover it loosely with foil during the resting period to keep it warm while the juices redistribute.
How long should a 4 lb roast rest before cutting?
Let the roast rest for 15 to 20 minutes after pulling it from the oven. This resting period allows the juices to settle back into the meat, resulting in a much more flavorful and juicy slice.
What is the best roast to cook in the oven for beginners?
Beef chuck roast and pork loin are excellent choices for beginners. They are forgiving, widely available, and taste great even if you are not perfectly precise with timing.
Can I use a convection oven to cook a 4 lb roast?
Absolutely. Convection ovens circulate hot air, which cooks more evenly. Reduce the temperature by 25°F and check the roast about 10 to 15 minutes earlier than the standard time.
How do I make gravy from the roasting pan?
After removing the roast, pour the pan juices into a saucepan. Add a cup of beef broth and bring it to a simmer. Whisk in a tablespoon of flour or cornstarch mixed with cold water. Stir until thickened, season with salt and pepper, and serve.
=== CONCLUSION ===
How long to cook 4 lb roast in oven comes down to three things: time, temperature, and a reliable meat thermometer. At 325°F, plan for about 1 to 1.5 hours for most cuts. At 350°F, you can shave off about 15 minutes. But numbers are just guidelines. The real secret is cooking to the right internal temperature and letting the roast rest before you slice it.
Follow the steps in this guide, avoid the common mistakes, and you will serve a perfectly juicy roast every time. Whether it is a beef chuck roast, a pork loin, or a leg of lamb, the principles stay the same. Season well, sear first, roast low and slow, and trust your thermometer. You have got this, and your roast will be the star of the table.