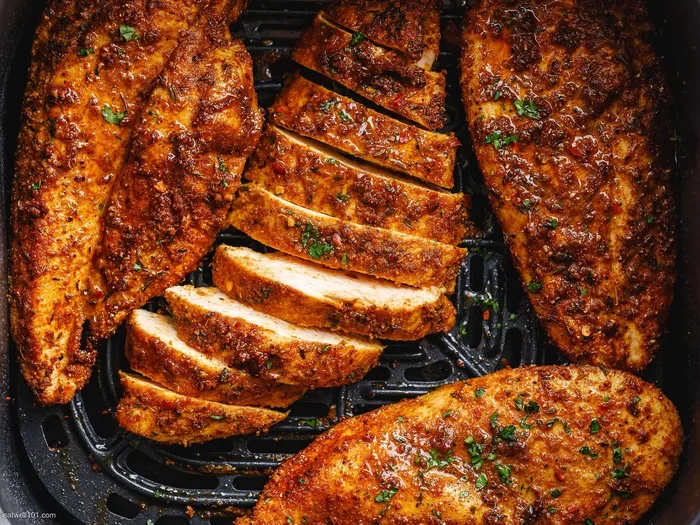
How Long To Put Chicken Strips In Oven For Perfect Results
Learning how long to put chicken strips in the oven is the key to crispy, juicy results every single time. Most chicken strips bake perfectly at 400°F for 20 to 25 minutes, but frozen strips need a few extra minutes. Whether you are using breaded strips, thin-cut breasts, or frozen store-bought strips, this guide covers the exact times, temperatures, and tips you need for perfect oven-baked chicken strips that everyone will love.
There is nothing better than golden, crispy chicken strips straight from the oven. Whether you are meal prepping for the week, making a quick weeknight dinner, or feeding a crowd, how long to put chicken strips in the oven is the question that determines success or failure. Too short, and they are undercooked. Too long, and they turn dry and rubbery. The good news is that once you know the right time and temperature, it becomes second nature.
This guide covers everything you need to know about baking chicken strips to perfection. From fresh strips to frozen ones, from thin cuts to thick breaded pieces, we have got you covered. You will learn the exact times, the best temperatures, and plenty of practical tips that make a real difference. By the end, you will feel confident every time you put a tray of chicken strips in the oven.
Let us get into it. No more guessing, no more dry chicken. Just perfectly baked oven-baked chicken strips that are crispy on the outside and juicy on the inside.
Key Takeaways
- Bake at 400°F for 20–25 minutes: This is the sweet spot for most fresh chicken strips to get golden and fully cooked.
- Frozen strips need 30–35 minutes: Always add extra time when cooking from frozen, and check the internal temperature.
- Internal temperature matters: Chicken strips are done when they reach 165°F in the thickest part.
- Pat dry and use a wire rack: These two simple steps make a huge difference in crispiness.
- Avoid overcooking: Overcooked chicken strips become dry and tough, so use a meat thermometer.
- Season generously: Simple seasoning with salt, pepper, garlic powder, and paprika elevates flavor dramatically.
- Let them rest: Resting chicken strips for 3–5 minutes after baking keeps them juicy.
📑 Table of Contents
The Ideal Oven Temperature for Chicken Strips
Getting the oven temperature right is the first step to great chicken strips. Most recipes agree that 400°F is the best temperature for baking chicken strips. At this heat, the outside gets crispy while the inside stays moist and tender.
Why 400°F Works So Well
When you bake chicken strips at 400°F, the high heat quickly seals the outside. This creates a golden crust that locks in moisture. Lower temperatures, like 350°F, take longer and can dry out the meat. Higher temperatures, like 425°F, risk burning the outside before the inside cooks through.
Here is a quick look at how temperature affects your chicken strips:
- 375°F: Slower cooking, slightly less crispy exterior, but very tender results.
- 400°F: The sweet spot for most chicken strips. Crispy outside, juicy inside.
- 425°F: Faster cooking, extra crispy, but requires close monitoring to avoid drying out.
For breaded chicken strips, 400°F is almost always the best choice. The breading needs high heat to crisp up properly without burning. For unbreaded or lightly seasoned strips, you can also use 400°F with great results.
Should You Use a Convection Oven?
If you have a convection oven, you can lower the temperature by 25°F. So instead of 400°F, set it to 375°F. The fan circulates hot air around the food, which cooks more evenly. This means your chicken strips will bake more consistently, with less chance of hot spots.
Convection ovens also reduce cooking time by about 5 minutes. So keep an eye on your strips and check them a few minutes early. The internal temperature is always your best guide.
How Long to Bake Chicken Strips (By Type)
The cooking time for chicken strips depends on several factors. Thickness, whether they are frozen or fresh, and whether they are breaded all play a role. Let us break it down by type so you know exactly what to expect.
Fresh Thin-Cut Chicken Strips
Thin-cut fresh chicken strips are the fastest to bake. At 400°F, they typically need 15 to 20 minutes. Because they are thin, they cook through quickly. You should still check the internal temperature to make sure they are safe to eat.
These strips are great for a quick weeknight meal. They go from oven to plate in less than half an hour. Just make sure not to overcook them, or they will lose their juiciness.
Fresh Thick-Cut Chicken Strips
Thick-cut strips need more time. At 400°F, plan for 22 to 28 minutes. The extra thickness means the heat needs more time to reach the center of the strip.
For the best results, flip the strips halfway through cooking. This ensures both sides get evenly golden. It also helps the inside cook more uniformly, preventing that annoying situation where the outside is done but the center is still cold.
Breaded Chicken Strips
Breaded chicken strips are a favorite for a reason. That crunchy coating adds so much flavor and texture. At 400°F, breaded strips usually need 20 to 25 minutes.
The breading acts as a protective layer, which helps keep the chicken inside moist. However, breaded strips can burn if left too long. Watch them closely during the last 5 minutes of cooking. You want the breading to be golden brown, not dark brown or black.
Frozen Chicken Strips
Cooking frozen chicken strips in the oven is perfectly fine and very convenient. You do not need to thaw them first. However, you need to add extra time. Frozen strips typically need 30 to 35 minutes at 400°F.
Because frozen strips have ice crystals on them, the surface stays wet longer. This can make the breading soggy if you do not account for it. To get crispy frozen chicken strips, place them on a wire rack instead of directly on a baking sheet. The air circulates underneath and helps the bottom get crispy too.
Homemade vs. Store-Bought Chicken Strips
There is a difference in how long to bake homemade versus store-bought strips. Homemade strips are often thicker and less processed, so they may need the full 25 minutes. Store-bought strips, especially the thinner frozen ones, can be done in 25 to 30 minutes.
Always read the package instructions for store-bought strips as a starting point. Then use a meat thermometer to confirm doneness. Every oven is slightly different, and actual results can vary.
Step-by-Step Guide to Perfect Oven-Baked Chicken Strips
Now that you know the times and temperatures, let us walk through the process step by step. Following these steps will give you consistently great results every time you bake chicken strips.
Step 1: Preheat Your Oven
Always preheat your oven to 400°F before placing the strips inside. Preheating ensures the oven reaches the correct temperature so your chicken strips start cooking immediately. This leads to more even cooking and a better crust on breaded strips.
Give your oven at least 10 to 15 minutes to preheat fully. Many ovens have a light or indicator that tells you when they are ready. Do not skip this step, even if you are in a hurry.
Step 2: Prepare the Baking Sheet
Line a baking sheet with parchment paper or lightly grease it with cooking spray. Parchment paper prevents sticking and makes cleanup a breeze. If you want extra crispy bottoms, use a wire cooling rack placed over the baking sheet.
A wire rack allows hot air to circulate all around the strips. This means the bottom gets crispy too, not just the top. It is a simple trick that makes a noticeable difference in texture.
Step 3: Arrange the Strips Properly
Place the chicken strips in a single layer on the baking sheet. Do not overlap them or crowd the pan. Overlapping strips steam instead of roast, which leads to soggy coating and uneven cooking.
Leave about half an inch of space between each strip. This might mean using two baking sheets if you have a lot of strips. Using two pans is better than cramming everything onto one.
Step 4: Bake for the Right Amount of Time
Set your timer based on the type of strips you are cooking. For fresh thin strips, 15 to 20 minutes. For thick or breaded strips, 20 to 25 minutes. For frozen strips, 30 to 35 minutes.
Halfway through cooking, open the oven and flip each strip. This promotes even browning on both sides. Use tongs to flip them gently so you do not tear the breading.
Step 5: Check the Internal Temperature
This is the most important step. Use a meat thermometer to check the thickest part of the strip. Chicken strips are fully cooked when they reach an internal temperature of 165°F.
Do not rely on color alone. Some chicken strips can look done on the outside but still be undercooked inside. A meat thermometer takes the guesswork out of the equation and keeps you safe.
Step 6: Rest Before Serving
Once your chicken strips are out of the oven, let them rest for 3 to 5 minutes. This allows the juices to redistribute throughout the meat. If you cut into them immediately, the juices run out, and the strips become dry.
Resting is a small step that makes a big difference. It is the same principle that applies to a good steak or roast chicken. A few minutes of patience pays off in juicier, more flavorful strips.
Tips for Crispy and Juicy Chicken Strips
Getting the perfect balance of crispy outside and juicy inside is an art. Here are some practical tips that will elevate your oven-baked chicken strips every single time.
Pat the Chicken Dry
Before seasoning or breading, pat your chicken strips dry with paper towels. Moisture on the surface creates steam in the oven, which prevents crispiness. The drier the surface, the crispier the result.
This is especially important for homemade strips where you have control over the moisture level. For store-bought frozen strips, remove them from the packaging and pat off any excess ice or moisture before baking.
Use a Wire Rack, Not a Flat Sheet
We mentioned this before, but it deserves repeating. A wire rack is the secret weapon for crispy chicken strips. It allows grease and steam to drip away from the meat, giving you an evenly crispy finish on all sides.
If you do not have a wire rack, you can still get decent results on a parchment-lined baking sheet. But the bottom of the strips will not be as crispy as the top.
Do Not Overcrowd the Pan
Overcrowding is one of the most common mistakes people make. When strips are too close together, they steam instead of roast. This leads to soft, soggy coating instead of that satisfying crunch.
Give each strip room to breathe. If your pan is not big enough, use a second one. The extra dish is worth the difference in texture.
Season Generously
Simple seasoning goes a long way with chicken strips. A mix of salt, black pepper, garlic powder, and smoked paprika creates a flavorful crust that complements the chicken perfectly.
For a bit of heat, add a pinch of cayenne pepper or chili powder. For an herby twist, try dried oregano, thyme, or rosemary. Seasoning the strips before baking means the flavor penetrates the surface, not just sits on top.
Brush with a Little Oil
A light brush of olive oil or melted butter on the strips before baking helps the coating brown faster and more evenly. It also adds a subtle richness to the flavor.
Use just a thin coating. Too much oil can make the strips greasy. A quick spray from a cooking oil spray bottle works great and keeps the fat content in check.
Common Mistakes to Avoid When Baking Chicken Strips
Even experienced cooks make mistakes when baking chicken strips. Knowing what to avoid saves time, prevents waste, and ensures better results every time.
Skipping the Preheat
Putting chicken strips into a cold oven throws off the cooking time and leads to uneven results. The strips spend too long in the temperature ramp-up phase, which can dry them out or leave the coating soggy.
Always wait for the oven to reach the target temperature before loading the strips. It takes just a few extra minutes but makes a noticeable difference.
Not Using a Meat Thermometer
Guessing whether chicken is done is a risk no one should take. Undercooked chicken is a food safety hazard, and overcooked chicken is tough and dry.
A simple meat thermometer costs just a few dollars and takes the guesswork out completely. Make it a habit to check the internal temperature every time you bake chicken strips.
Opening the Oven Door Too Often
Every time you open the oven door, heat escapes. This drops the oven temperature and can affect how your chicken strips cook. Frequent opening can lead to uneven browning and longer cooking times.
Resist the urge to check on them constantly. Instead, set a timer and trust the process. Open the door only when it is time to flip the strips or check the final result.
Using the Wrong Pan
Dark, non-stick pans absorb more heat and can cause the bottom of your strips to burn. Light-colored aluminum baking sheets or stainless steel pans provide more even heat distribution.
If you only have a dark pan, reduce the oven temperature by 25°F and check the strips a few minutes early. Adjusting for the pan type is a small change that prevents big problems.
Forgetting to Flip the Strips
Baking chicken strips on only one side means one side gets much more heat exposure than the other. Flipping halfway through ensures even browning and more uniform cooking.
Use a spatula or tongs to flip gently. If the breading is sticking, it probably means the strips are not done yet and need more time before you attempt to turn them.
Expert Tips for Better Chicken Strips Every Time
Here are some bonus tips from experienced cooks that take your chicken strip game to the next level. These are small changes that deliver big improvements.
- Brine for extra juiciness: Soak strips in salted water for 30 minutes before baking. This adds moisture that stays locked in during cooking.
- Double-dip for extra breading: For thicker, crunchier coating, dip the strips in egg wash and breadcrumbs twice before baking.
- Add a pinch of cornstarch to breading: Cornstarch creates an extra crispy layer on the outside of the coating.
- Let strips come to room temperature: If using frozen strips, let them sit out for 10 minutes before baking. This helps them cook more evenly.
- Use a silicone baking mat: These mats promote even browning and prevent sticking without needing excess oil or parchment paper.
How long to put chicken strips in the oven is really just the starting point. The real secret is in the details: the prep, the placement, the flipping, and the resting. Master these, and your chicken strips will be consistently delicious.
Conclusion
Baking chicken strips in the oven is one of the easiest and most satisfying meals you can make. The key is getting the time and temperature just right. For most fresh chicken strips, 400°F for 20 to 25 minutes is the golden rule. Frozen strips need 30 to 35 minutes at the same temperature. Always check that the internal temperature reaches 165°F to be safe.
With the tips in this guide, you now have everything you need to bake perfect chicken strips every time. From patting the chicken dry to using a wire rack, from flipping halfway through to letting them rest after baking, these small steps add up to a big difference in texture and flavor.
Next time you wonder how long to put chicken strips in the oven, you will know exactly what to do. No more guesswork, no more dry or undercooked strips. Just crispy, juicy, delicious chicken strips that are ready in under half an hour. Get in the kitchen, preheat that oven, and enjoy the process. You have got this!
Frequently Asked Questions
Can I bake chicken strips at 350°F instead of 400°F?
Yes, you can bake chicken strips at 350°F, but it will take longer, usually around 25 to 30 minutes for fresh strips. The lower temperature means less crispiness on the outside, so 400°F is generally recommended for the best texture and flavor.
How do I know if chicken strips are fully cooked?
The only reliable way to check is by using a meat thermometer. Insert it into the thickest part of the strip. Chicken strips are fully cooked and safe to eat when the internal temperature reaches 165°F. Do not rely on color or texture alone.
Can I cook frozen chicken strips directly in the oven?
Absolutely. You can cook frozen chicken strips without thawing them first. Just add about 10 extra minutes to the cooking time. At 400°F, frozen strips typically need 30 to 35 minutes. Place them on a wire rack for the crispiest results.
What is the best way to keep chicken strips crispy after baking?
The best way is to place baked strips on a wire rack instead of a flat plate. This prevents steam from building underneath and making the coating soggy. Avoid covering the strips with foil or a lid after baking, as trapped moisture will soften the crust.
How long do leftover baked chicken strips last in the fridge?
Leftover baked chicken strips can be stored in an airtight container in the refrigerator for up to 3 to 4 days. Reheat them in the oven at 375°F for about 5 to 7 minutes to maintain their crispiness. Avoid microwaving, which tends to make the coating soft and rubbery.
Can I use chicken thighs instead of chicken breasts for strips?
Yes, chicken thighs work great for oven-baked strips. They are naturally juicier and more flavorful than chicken breasts. However, thigh strips may need 2 to 3 extra minutes of baking time at 400°F because they are slightly fattier and denser than breast meat.