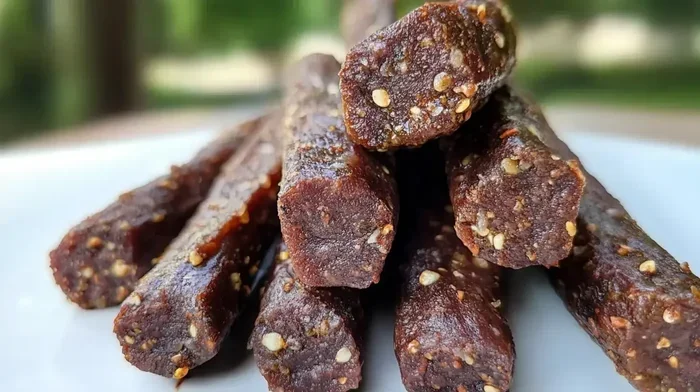
How Long To Cook Venison Snack Sticks In Your Oven
Cooking venison snack sticks in your oven is simple, affordable, and delivers amazing results. You need the right temperature, timing, and a solid recipe to get perfect snack sticks every time. This guide covers everything from prep to oven finish, so you can make venison snack sticks with confidence. Whether you are a beginner or a seasoned hunter, you will find practical tips that work.
Making venison snack sticks at home is one of the most rewarding things you can do in the kitchen. You take raw venison, mix it with seasoning, stuff it into casings, and let your oven do the hard work. The result is a delicious, high-protein snack that beats anything you buy at the store. And the best part? You control every ingredient that goes in.
If you have ever wondered how long to cook venison snack sticks in oven, you are in the right place. This guide walks you through the entire process from start to finish. We will cover temperatures, timing, common mistakes, and pro tips that make a huge difference. By the end, you will feel confident enough to make your first batch this weekend.
Key Takeaways
- Cook at 185°F to 200°F for the best texture and safe internal temperature.
- Plan for 2 to 4 hours of oven time depending on stick size and moisture content.
- Use a meat thermometer to ensure venison snack sticks reach 160°F internally.
- Fat content matters — keep it around 10-15% for the best results.
- Cure your meat first with curing salt for food safety and flavor.
- Rest your snack sticks after cooking to lock in juiciness.
- Store properly in airtight containers for up to 2 weeks at room temperature.
📑 Table of Contents
- What Are Venison Snack Sticks and Why Make Them at Home?
- The Best Oven Temperature for Venison Snack Sticks
- Step-by-Step Guide to Cooking Venison Snack Sticks in the Oven
- How Long to Cook Venison Snack Sticks — Time and Temperature Guide
- Common Mistakes to Avoid When Making Venison Snack Sticks
- Tips for Perfect Venison Snack Sticks Every Time
- Storing and Enjoying Your Homemade Venison Snack Sticks
- Final Thoughts on Cooking Venison Snack Sticks in the Oven
What Are Venison Snack Sticks and Why Make Them at Home?
Venison snack sticks are thin, cured sausage sticks made from ground venison. They are similar to beef jerky but have a softer, more snackable texture. People love them because they are portable, packed with protein, and incredibly tasty. They make great hiking food, road trip snacks, or even a quick protein boost after a workout.
Making them at home gives you full control over what goes in. Store-bought versions often contain fillers, artificial flavors, and preservatives. When you make your own, you know exactly what you are eating. Plus, homemade snack sticks taste significantly better in most cases.
Why Choose Venison Over Other Meats
Venison is a lean, wild game meat that offers a rich, slightly sweet flavor. It is lower in fat and calories compared to beef or pork. This makes it an excellent choice for health-conscious snackers. However, the low fat content can also make venison snack sticks drier if you are not careful. That is why the cooking process matters so much.
Many hunters process their deer harvest into snack sticks. It is a great way to use the meat from a hunt and avoid waste. Even if you buy venison from a butcher, making snack sticks is a cost-effective way to enjoy this lean game meat all year round.
Basic Equipment You Will Need
You do not need fancy gear to make great snack sticks. Here is what you need to get started:
- Meat grinder or food processor for grinding venison
- Stuffer or sausage stuffing attachment for casings
- Oven — your standard kitchen oven works perfectly
- Meat thermometer to monitor internal temperature
- Casing — collagen casings are easiest for beginners
- Curing salt (Prague powder #1) for food safety
- Mixing bowls and a spatula for blending
You do not need a smoker or a food dehydrator. Your regular oven handles the job beautifully. This is one reason so many people start with oven-baked venison snack sticks instead of other methods.
The Best Oven Temperature for Venison Snack Sticks
Getting the temperature right is the single most important factor in making great snack sticks. Too hot and the outside burns before the inside cooks. Too cool and the sticks take forever and may not dry properly.
Recommended Temperature Range
The ideal oven temperature for cooking venison snack sticks is between 185°F and 200°F. This range allows the meat to cook slowly and evenly. It also drives out moisture at a controlled pace, which gives you that perfect firm-but-chewy texture.
Some recipes start at a lower temperature around 150°F for the first hour. This gentle start helps the casings set and prevents them from shrinking too much. Then you bump the heat up to 185°F or 200°F for the remaining cooking time. This two-stage approach is a favorite among experienced snack stick makers.
Why Low and Slow Works Best
Venison is extremely lean. When you cook lean meat at high temperatures, it dries out quickly and becomes tough. The low-and-slow method gently renders any small amounts of fat while slowly removing moisture. This creates a snack stick that is firm, flavorful, and easy to bite through without being crunchy like jerky.
Think of it like baking bread. You would not blast a loaf at 500°F and expect great results. The same patience applies to your venison snack sticks. Give them time and steady heat, and they will turn out fantastic.
Temperature Mistakes to Avoid
The biggest mistake people make is setting their oven too high. Some folks crank it to 350°F thinking it will speed things up. This is a disaster waiting to happen. The outside burns while the inside stays raw and greasy. Always stick to the recommended range of 185°F to 200°F for the best results.
Step-by-Step Guide to Cooking Venison Snack Sticks in the Oven
Now that you understand the basics, let us walk through the full process. This step-by-step guide will take you from raw ingredients to finished snack sticks ready to enjoy.
Step 1: Prepare Your Venison Meat
Start with about 2 pounds of venison. You can use any cut — shoulder, hindquarters, or even ground venison from the butcher. Trim off any visible sinew or silver skin. You want clean, pure meat for the best texture.
Cut the meat into chunks roughly the size of your fist. This makes it easier to grind and ensures a consistent texture throughout your snack sticks. Place the chunks in the freezer for about 30 minutes before grinding. Partially frozen meat grinds more cleanly and produces a better texture.
Step 2: Grind and Mix Your Meat
Grind the venison using a fine grind plate, about 3/16 of an inch. Some people do a double grind for an even smoother texture. After grinding, add your seasoning blend and curing salt. Mix everything thoroughly using your hands or a stand mixer with a paddle attachment.
Here is a simple seasoning ratio for about 2 pounds of meat:
- 1 tablespoon kosher salt
- 1 teaspoon curing salt (Prague powder #1)
- 1 teaspoon black pepper
- 1 teaspoon garlic powder
- 1 teaspoon onion powder
- 1 teaspoon paprika
- 1 teaspoon brown sugar
- 1 teaspoon mustard powder
- 1/2 teaspoon cayenne pepper (optional for heat)
Mix the seasonings into the meat until everything is evenly distributed. The meat should feel slightly sticky and hold together when squeezed. This stickiness comes from the protein and helps the snack sticks hold their shape.
Step 3: Stuff the Casings
Soak your collagen casings in warm water for about 10 minutes. This softens them and makes stuffing easier. Attach the casing to your stuffer or sausage stuffing attachment and start filling.
Stuff the meat firmly but not too tightly. You want the casings filled completely without air pockets. Air pockets cause uneven cooking and can burst during the oven process. Once stuffed, twist the casing into links about 5 to 6 inches long. Use kitchen twine or simply twist tie the ends.
Step 4: Preheat and Arrange in the Oven
Preheat your oven to 185°F. While it is warming up, line a baking sheet with parchment paper and place a wire rack on top. Arrange your stuffed snack sticks on the rack with space between each one. You want air to circulate around every stick for even drying.
Place the rack in the oven on the middle position. If your oven runs hot, you may want to use an oven thermometer to verify the actual temperature. Many home ovens are off by 10 to 25 degrees, and this matters when you are cooking for hours.
Step 5: Cook and Monitor
Set a timer and let the oven work. The cooking time varies based on the size of your snack sticks and how moist your meat mixture was. For most batches, you will need between 2 and 4 hours. Check the internal temperature with a meat thermometer — you want the center to reach 160°F for food safety.
After the first hour, you can rotate the baking sheet if your oven has hot spots. This ensures even cooking on all sides. Some people also prop the oven door open slightly with a wooden spoon to allow moisture to escape. This speeds up the drying process and prevents the sticks from getting too soft.
Step 6: Cool and Store
Once your venison snack sticks reach 160°F internally and look firm on the outside, pull them out of the oven. Let them cool completely on a wire rack. This cooling step is important because the texture firms up as they cool. Cutting into them too early can make them seem softer than they will be once fully cooled.
Store your finished snack sticks in an airtight container or vacuum-sealed bag. They will keep for up to 2 weeks at room temperature or about 1 month in the refrigerator. For longer storage, freeze them and they will last up to 3 months.
How Long to Cook Venison Snack Sticks — Time and Temperature Guide
The answer to how long to cook venison snack sticks in oven depends on several factors. Let us break it down so you can plan your cooking session with confidence.
Cooking Time Based on Stick Size
Size matters a lot when it comes to cooking time. Thinner snack sticks cook faster because heat penetrates them more quickly. Thicker sticks need more time for the center to reach the safe internal temperature.
- Thin sticks (1/4 inch diameter): About 2 to 2.5 hours at 185°F
- Medium sticks (1/2 inch diameter): About 2.5 to 3.5 hours at 185°F
- Thick sticks (3/4 inch diameter): About 3.5 to 4 hours at 185°F
If you prefer a chewier texture, cook them closer to the longer end of the range. For a softer, more tender snack stick, pull them earlier. There is no single perfect time — it comes down to personal preference.
Time Comparison Table
| Stick Size | Oven Temp | Cook Time | Internal Temp Goal |
|---|---|---|---|
| Thin (1/4 inch) | 185°F | 2 to 2.5 hours | 160°F |
| Medium (1/2 inch) | 185°F | 2.5 to 3.5 hours | 160°F |
| Thick (3/4 inch) | 185°F | 3.5 to 4 hours | 160°F |
| Any size (two-stage) | 150°F then 200°F | 3 to 4 hours total | 160°F |
Two-Stage Cooking Method
The two-stage method is a popular technique among snack stick enthusiasts. In the first stage, you cook at 150°F for 1 hour. This gently heats the meat and sets the casings. In the second stage, you increase the temperature to 200°F for the remaining 2 to 3 hours. This approach gives you excellent results with a beautiful color and firm texture.
How to Tell When They Are Done
Do not rely solely on the clock. Use your senses and a meat thermometer. Here is how to know your venison snack sticks are ready:
- The internal temperature reaches 160°F
- The outside looks dry and has a slight sheen
- When you bend a stick, it feels firm but does not crack
- The color has darkened evenly from raw red to a deep brownish-red
- They feel lighter in weight because moisture has been driven out
Expert Insight: Experienced snack stick makers recommend the bend test. Pick up a stick and bend it into a U-shape. If it bends without cracking, it is done. If it snaps, it needs more time. This simple test has been passed down through generations of meat processors and it really works.
Common Mistakes to Avoid When Making Venison Snack Sticks
Even with a great recipe, mistakes can happen. Here are the most common errors people make and how to avoid them.
Mistake 1: Skipping the Cure
Some people skip the curing salt to save time or because they think it is unnecessary. This is a dangerous mistake. Curing salt prevents harmful bacteria like botulism from growing during the low-temperature cooking process. Always use Prague powder #1 in the exact amount your recipe calls for.
Mistake 2: Using Too Much Fat
Venison is naturally lean, which is great for health but challenging for snack sticks. Some people add too much beef fat to compensate, which makes the sticks greasy and shortens their shelf life. Keep fat content around 10-15% of the total meat weight. This gives you enough moisture and flavor without the greasiness.
Mistake 3: Overstuffing the Casings
It is tempting to stuff the casings as full as possible. Overstuffing causes the casings to burst during cooking, creating a mess in your oven and wasting meat. Stuff them firmly but leave a little room for expansion.
Mistake 4: Opening the Oven Door Too Often
Every time you open the oven door, you lose heat and moisture. This slows down the cooking process and can result in unevenly dried snack sticks. Resist the urge to check on them constantly. Trust your thermometer and only open the door when you need to rotate the pan or check the temperature.
Mistake 5: Not Letting Them Rest
Freshly cooked snack sticks are soft and somewhat limp. Many people assume they are done and start eating them right away. Give them at least 30 minutes to cool and firm up. The texture improves dramatically during this resting period.
Quick Tips:
- Place a small fan near your oven to help moisture escape during cooking
- Use a baking stone on the rack below your snack sticks for more even heat distribution
- Label your snack sticks with the date and flavor so you can track what works best
- Keep a notebook of your batches — small changes in time or temperature make a big difference
Tips for Perfect Venison Snack Sticks Every Time
Once you have the basics down, these pro tips will take your snack sticks to the next level.
Use a Flavor Enhancer
Add a splash of apple cider vinegar to your meat mixture — about 1 tablespoon per pound. This adds a subtle tang that enhances the overall flavor. It also helps the casing slide on more smoothly during stuffing.
Experiment with Seasonings
Do not be afraid to get creative with your seasoning blends. Popular variations include pepperoni-style with extra fennel, teriyaki with soy sauce and ginger, or southwest style with cumin and chili powder. Keep notes on what you try so you can recreate your favorites.
Batch Cook and Freeze
Making a large batch is more efficient than cooking small amounts. You can freeze uncooked stuffed snack sticks on a baking sheet, then transfer them to freezer bags. When you are ready to eat them, just pop them in the oven straight from frozen and add 30 minutes to the cook time.
The Role of Humidity
Your kitchen’s humidity level affects how quickly your snack sticks dry. On humid days, cooking may take longer. On dry days, they may be done sooner. Adjust your timing by 30 minutes in either direction based on the weather. This is another reason the bend test and meat thermometer are so valuable.
Key Takeaways for This Section:
- The two-stage cooking method produces the best texture and color
- Always use curing salt for food safety
- Keep fat content between 10-15% for optimal results
- The bend test is the most reliable way to check doneness
- Experiment with flavors but keep notes for consistency
Storing and Enjoying Your Homemade Venison Snack Sticks
Once your snack sticks are cooled and ready, proper storage keeps them fresh and delicious. The method you choose depends on how quickly you plan to eat them.
Short-Term Storage
For snack sticks you plan to eat within two weeks, store them in an airtight container or zip-lock bag at room temperature. Keep them in a cool, dark place away from direct sunlight. A pantry or cupboard works perfectly.
Long-Term Storage
For longer storage, vacuum-seal your snack sticks and freeze them. They will stay fresh for up to 3 months in the freezer. When you want to enjoy some, let them thaw at room temperature for about 30 minutes. They taste just as good as the day you made them.
Serving Ideas
Venison snack sticks are delicious on their own, but you can also get creative with them. Here are some serving ideas:
- Chop them up and add to scrambled eggs for a protein-packed breakfast
- Slice them into rounds for a charcuterie board
- Add to trail mix with nuts and dried fruit
- Use as a pizza topping for a wild game twist
- Serve with cheese and crackers for a simple appetizer
The versatility of homemade venison snack sticks makes them a staple in many households. Once you start making them, you will wonder why you ever bought the expensive store-bought versions.
Final Thoughts on Cooking Venison Snack Sticks in the Oven
Making venison snack sticks in your oven is one of the easiest and most satisfying cooking projects you can take on. You do not need expensive equipment or years of experience. With the right temperature, timing, and a little patience, you can produce snack sticks that rival any commercial product.
The key to success lies in understanding how long to cook venison snack sticks in oven and paying attention to the details. Keep your oven at 185°F to 200°F, monitor the internal temperature until it reaches 160°F, and give them enough time to dry properly. Avoid the common mistakes, follow the steps outlined in this guide, and you will be making perfect snack sticks in no time.
Remember, every batch teaches you something new. Your first batch might not be perfect, and that is okay. Adjust your time, temperature, or seasoning based on what you learned. Soon enough, you will have a reliable process that produces delicious venison snack sticks every single time. So fire up your oven, grab some venison, and enjoy the process of creating something truly great from scratch.
Frequently Asked Questions
Can I use a regular home oven to make venison snack sticks?
Yes, absolutely. A standard home oven works perfectly for making venison snack sticks. You just need to set it to a low temperature between 185°F and 200°F. Most ovens can maintain this temperature without any special equipment or modifications.
Do I need to use casings, or can I just cook the meat mixture flat?
Casings give snack sticks their classic shape and make them easier to handle and store. However, you can skip casings and spread the meat mixture flat on a parchment-lined baking sheet. Just know that the cook time will be shorter since the meat will be thinner and dry out faster.
What is the difference between venison snack sticks and beef jerky?
Venison snack sticks are made from ground meat stuffed into casings, while beef jerky is made from sliced, whole-muscle meat. Snack sticks have a softer, more uniform texture, whereas jerky is typically chewier and has a more varied texture. Both are delicious, but the preparation methods are quite different.
Can I substitute beef or pork for venison in this recipe?
Yes, you can use beef or pork, or even a combination of meats. Keep in mind that beef has more fat than venison, which changes the cooking time and texture. Pork adds moisture and flavor but also increases fat content. Adjust your cook time accordingly if you use a different meat.
How do I know if my snack sticks are undercooked?
Use a meat thermometer to check the internal temperature. If the center has not reached 160°F, the snack sticks need more time. Undercooked snack sticks may feel soft, look pale in the center, or feel greasy when you bite into them. Always prioritize food safety and cook until the proper temperature is reached.
Can I make venison snack sticks without curing salt?
It is not recommended. Curing salt (Prague powder #1) is essential for food safety when making cured meat products at low temperatures. It prevents the growth of dangerous bacteria like Clostridium botulinum. Always follow your recipe and use the correct amount of curing salt for safe results.
=== CONCLUSION ===
Cooking venison snack sticks in your oven is a simple, rewarding process that anyone can master. With the right temperature of 185°F to 200°F and a cook time of 2 to 4 hours, you will produce delicious, protein-packed snacks that are far superior to anything from a store shelf. The key is patience, attention to detail, and a willingness to learn from each batch you make.
Start with the basic recipe outlined in this guide, and soon you will be experimenting with flavors, adjusting textures, and perfecting your personal style. Whether you are processing your own hunt or just looking for a healthy snack option, homemade venison snack sticks deliver on every level. So grab your venison, fire up the oven, and enjoy the process of creating something truly homemade and delicious.